Phipps Stories

Vermicomposting: In House Composting for all Seasons
Red Wiggler worms make for the perfect household pet - these small worms are low maintenance, affordable, and not only do they clean up after themselves - they’ll take care of your trash too! Vermicomposting (composting with worms) is an excellent way to reduce your landfill waste and help your garden thrive.
We recently hatched our own worms to set up a new vermicomposting system. Although it took some time for the worms to appear, it was well worth the wait!
It all starts with the right worm - unlike the earthworms you may find in your backyard, Red Wigglers (Eisenia fetida) do not need deep layers of soil to tunnel through. You can buy worms in the adult stage of their lives or as eggs. We ordered our eggs from Gardens Alive, but there are many other places to buy adult worms online or in bait shops.
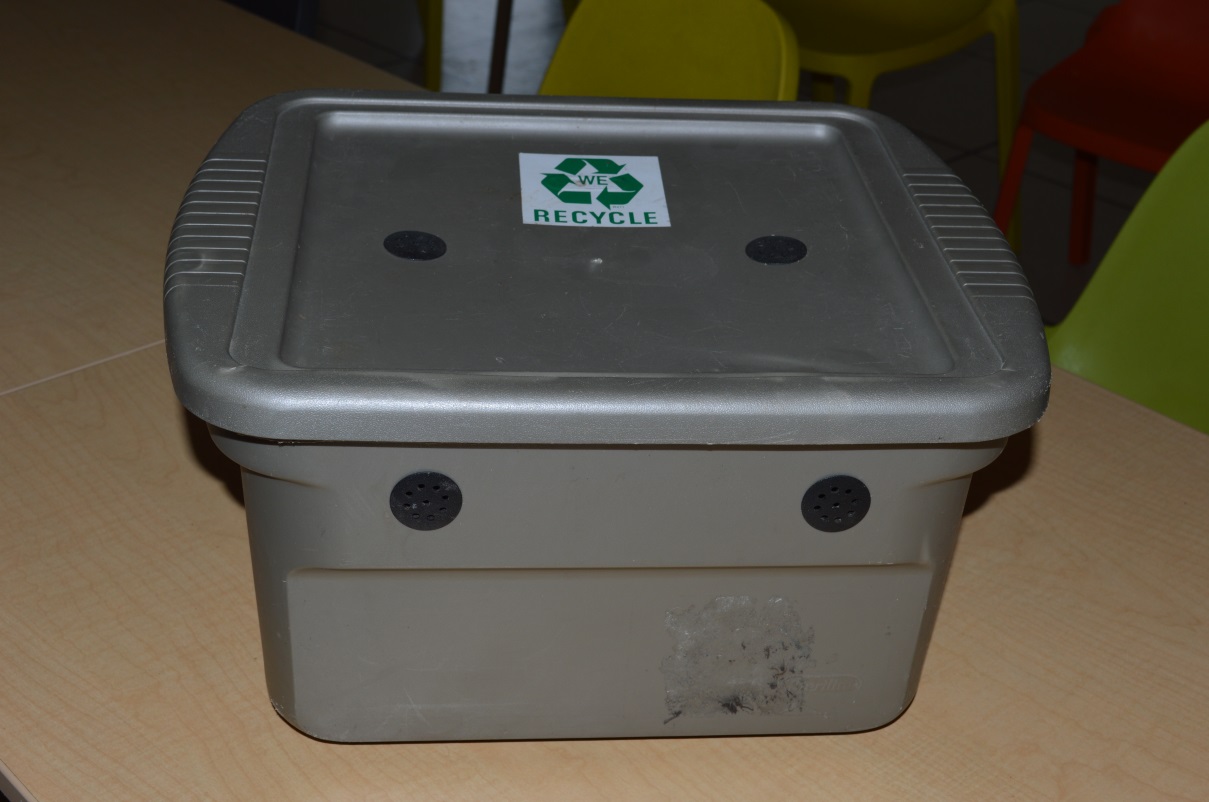
The next stop was to build our worms a home. Worm bins can be purchased online or easily constructed at home. To build your own:
1. Find a plastic container with a lid. A 10 gallon, 16” x 24” works well, and it does not need to be more than 8-12 inches deep.
2. Drill holes (¼ - ½ ” diameter) around the top of container on each side- about 3 to 4 holes per side.
3. Glue strips of mesh screen over holes, making sure there are no gaps for worms to escape.
4. Add 3-4 inches of soil, then mix in shredded newspaper. Add more soil and paper until you reach desired depth
5. Add water so it is damp but not wet.
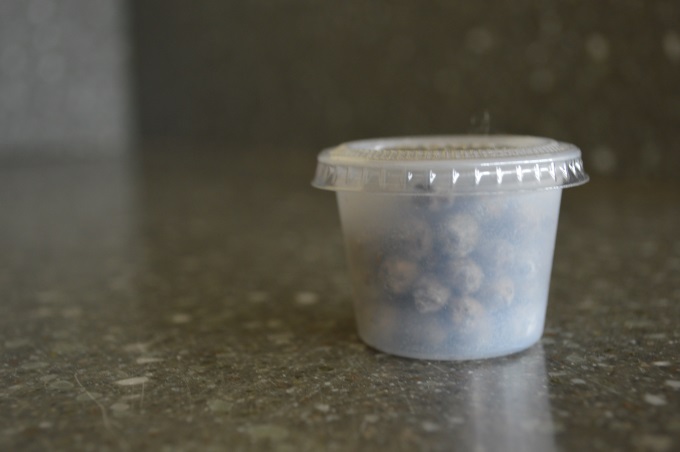
Our worm cocoons arrived encapsulated, and we kept them refrigerated until we were ready to soak them (the sooner you do this, the better). We poured them into a bowl of water, and after several minutes, small brown, oval cocoons had appeared! There can be multiple worms in each one. Strain the water using a fine sieve, and pick out the cocoons.
The final step of the hatching process was to place the cocoons on top of the soil and close the container.
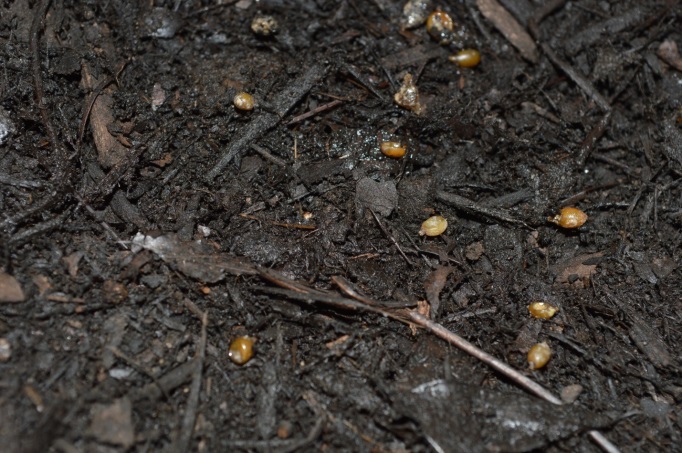
Your worms will take about a month to hatch, however some may take much longer - ours took about 2 months. At this early stage in their lives, your little worms are in a state of diapause, which means that their development is paused and will continue when the conditions are right. Keep checking your container at least weekly to see if any of your cocoons have hatched.
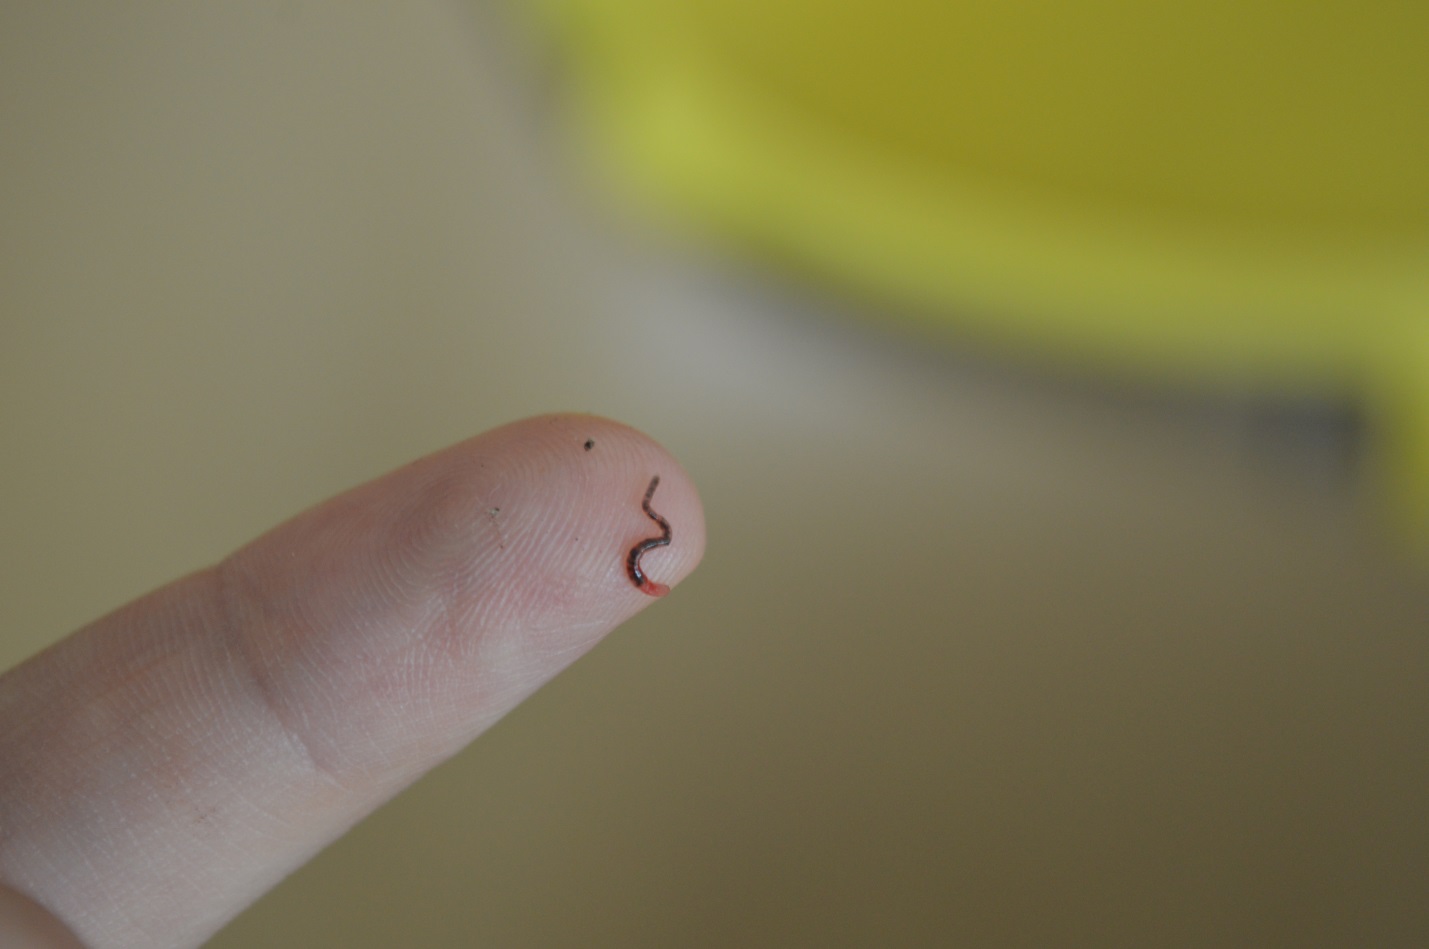
The worms are, unsurprisingly, very small at first. They will be white but soon turn red as their name suggests. Once you see the small worms squirming around, you can start adding food. Check out the list below for the do’s and don’ts of food to add. Start with small amounts of scraps from your kitchen, and gradually, as your worms grow, add more. Once they are fully mature, they can eat over half their weight each day! With all of this eating, they will quickly grow to be about 1 to 2 inches long.
Worm Bin Maintenance:
Feeding Worms:
Do Add: Raw fruit (except citrus) and vegetable scraps, bread products, plant cuttings.
DO NOT add: citrus fruit, meats, oils, dairy, cooked food, bones, salty/fatty food, already rotting food.
Avoid using foods with strong odors like onions or broccoli, as they may make your worm bin smell bad after a few days.
Other things to note:
The temperature of your bin should not go below freezing or above 84°F. 55-75°F degrees is ideal.
Once your worms are fully grown, turn the bin material every few days to prevent the bottom material from becoming water logged. If there is too much water, add shredded paper or other dry, “brown” materials like grass or leaves. Give the bin a day to adjust and then see if you need to add more.
Resources Used:
Gardens Alive: http://cdn.gardensalive.com/downloads/4339_PIS.pdf


