Phipps Stories

#bioPGH Blog: An Autumn Experiment!
 A resource of Biophilia: Pittsburgh, #bioPGH is a weekly blog and social media series that aims to encourage both children and adults to reconnect with nature and enjoy what each of our distinctive seasons has to offer.
The colors are changing and the leaves are falling! If you remember from previous posts, when we see the colors changing, what we are actually seeing is chlorophyll breaking down to reveal other pigments that have been in the leaves all along, just in smaller quantities than the green. Would you like to see how that works up close?
Let’s do a little refresher on what the different color plant pigments are and then learn how to separate out the pigments in leaves!
Green
During photosynthesis, plants use sunlight to convert carbon dioxide and water into the sugars they need to thrive and the oxygen we all breathe. One of the key factors in making this process possible is chlorophyll, a pigment found in plant cells that absorbs light within the blue and red spectrums but reflects green. This reflection is what makes leaves have a green appearance.
Yellow
Yellow pigments called xanthophylls increase the ability of plants to absorb light by capturing wavelengths that chlorophyll cannot during the process of photosynthesis. Usually masked by the green reflection of chlorophyll in mature leaves during the spring and summer, the yellow coloration of xanthophylls often appears when chlorophyll production stops in the fall.
Orange
Carotenoids are a group of photosynthetic pigments responsible for giving many plants a bright orange or yellow appearance but are also often noted for their nutritional value and potential antioxidant properties. Among them are beta-carotene (found in carrots and cantaloupes), lycopene (found in tomatoes and watermelon) and lutein (found in corn and leafy greens).
Red and Purple
Lending red, purple and bluish hues to certain plants, anthocyanin is another pigment found in nature. Often irresistible to passersby, anthocyanin-rich fruits are known to have colorful skins that tempt animals, which then consume these edibles and disperse the seeds, while bright red and purple flowers attract pollinators. When present in stems and leaves, this pigment can also act as a kind of plant sunscreen, absorbing potentially stress-inducing blue-green and UV light.
Are you ready to see some individual plant pigments up close? Let’s try a chromatography activity!
Chromatography
Chromatography is a term used to describe lab techniques that separate out the contents of mixtures by sending the mixture through something like a gas or a solid material. In this case, our mixture will be a solution of plant pigments and either acetone or rubbing alcohol, and the different plant pigments will be traveling at different speeds up a paper towel. For this protocol, you can soak leaf bits in either rubbing alcohol or acetone (most nail polish removers), but I tried them both in parallel trials and found the acetone had more vibrant results. Note, don’t mix the rubbing alcohol and acetone; just use one or the other.
What You Will Need
- A variety of leaves
- Acetone-based nail polish remover or rubbing alcohol*
- Mortar and pestle or a spoon
- Enough cups for each leaf type (glass will work the best with nail polish remover)
- Paper Towels
- Labels of some sort
- Marker to label
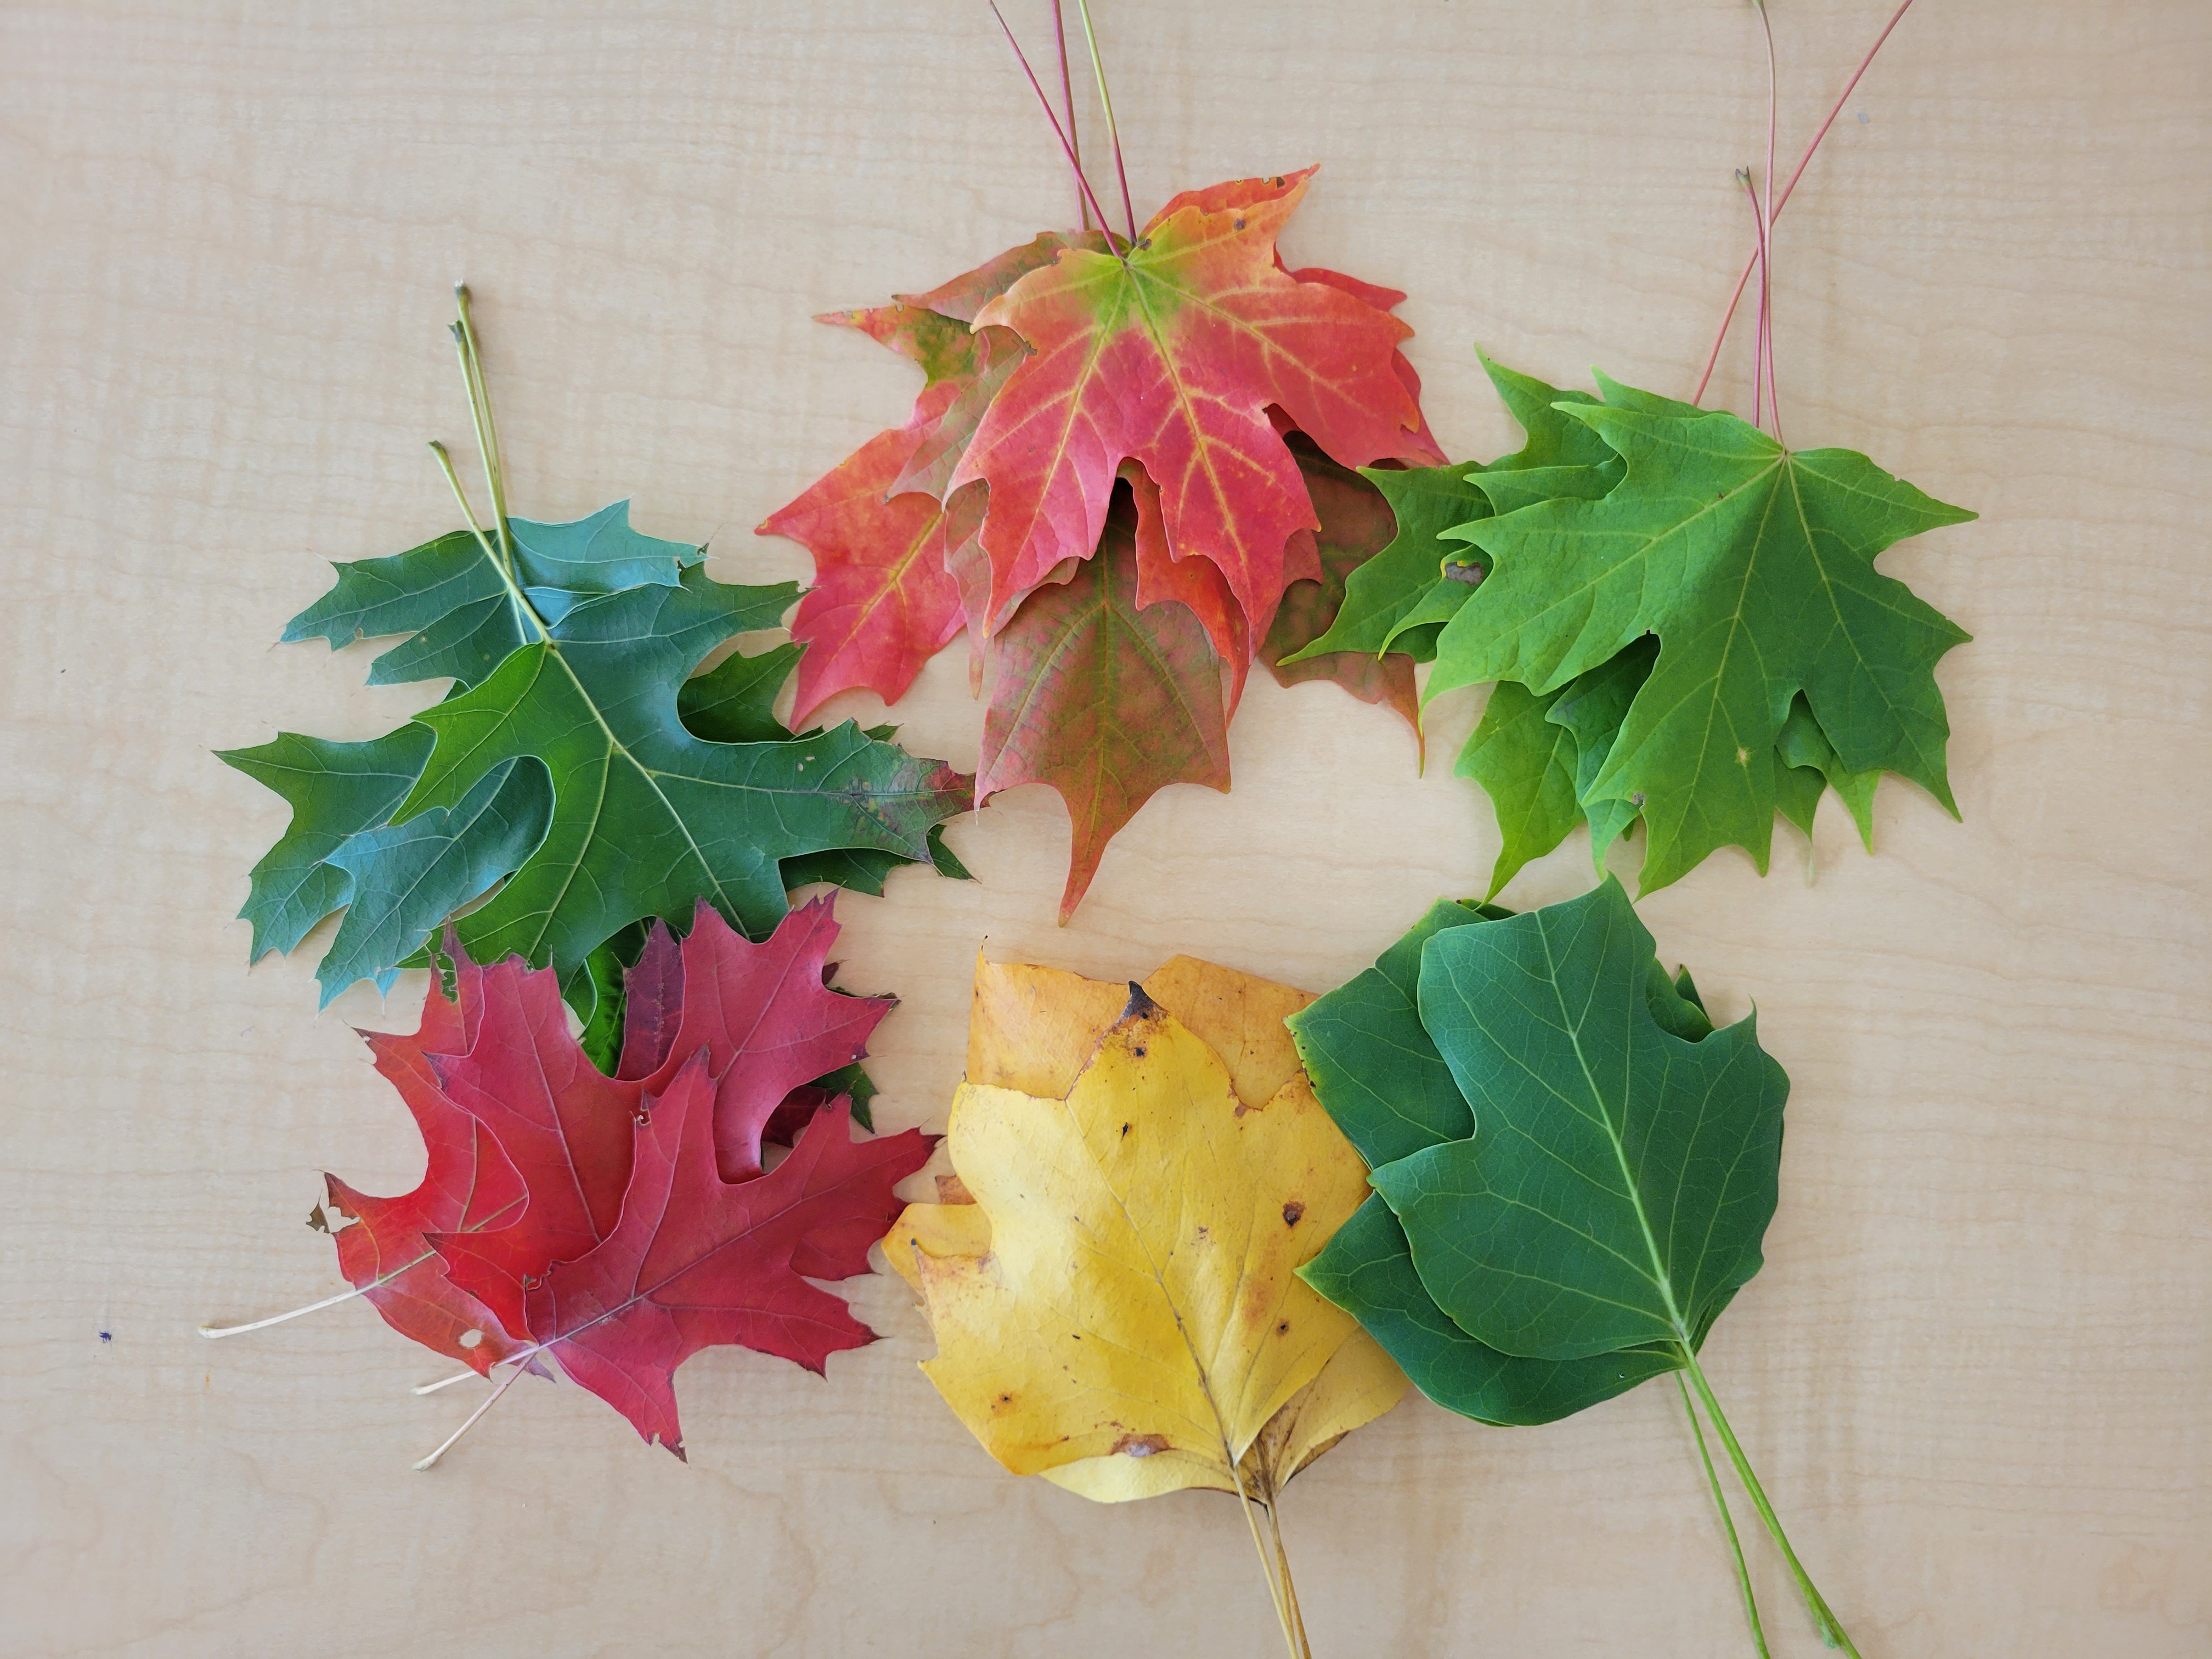
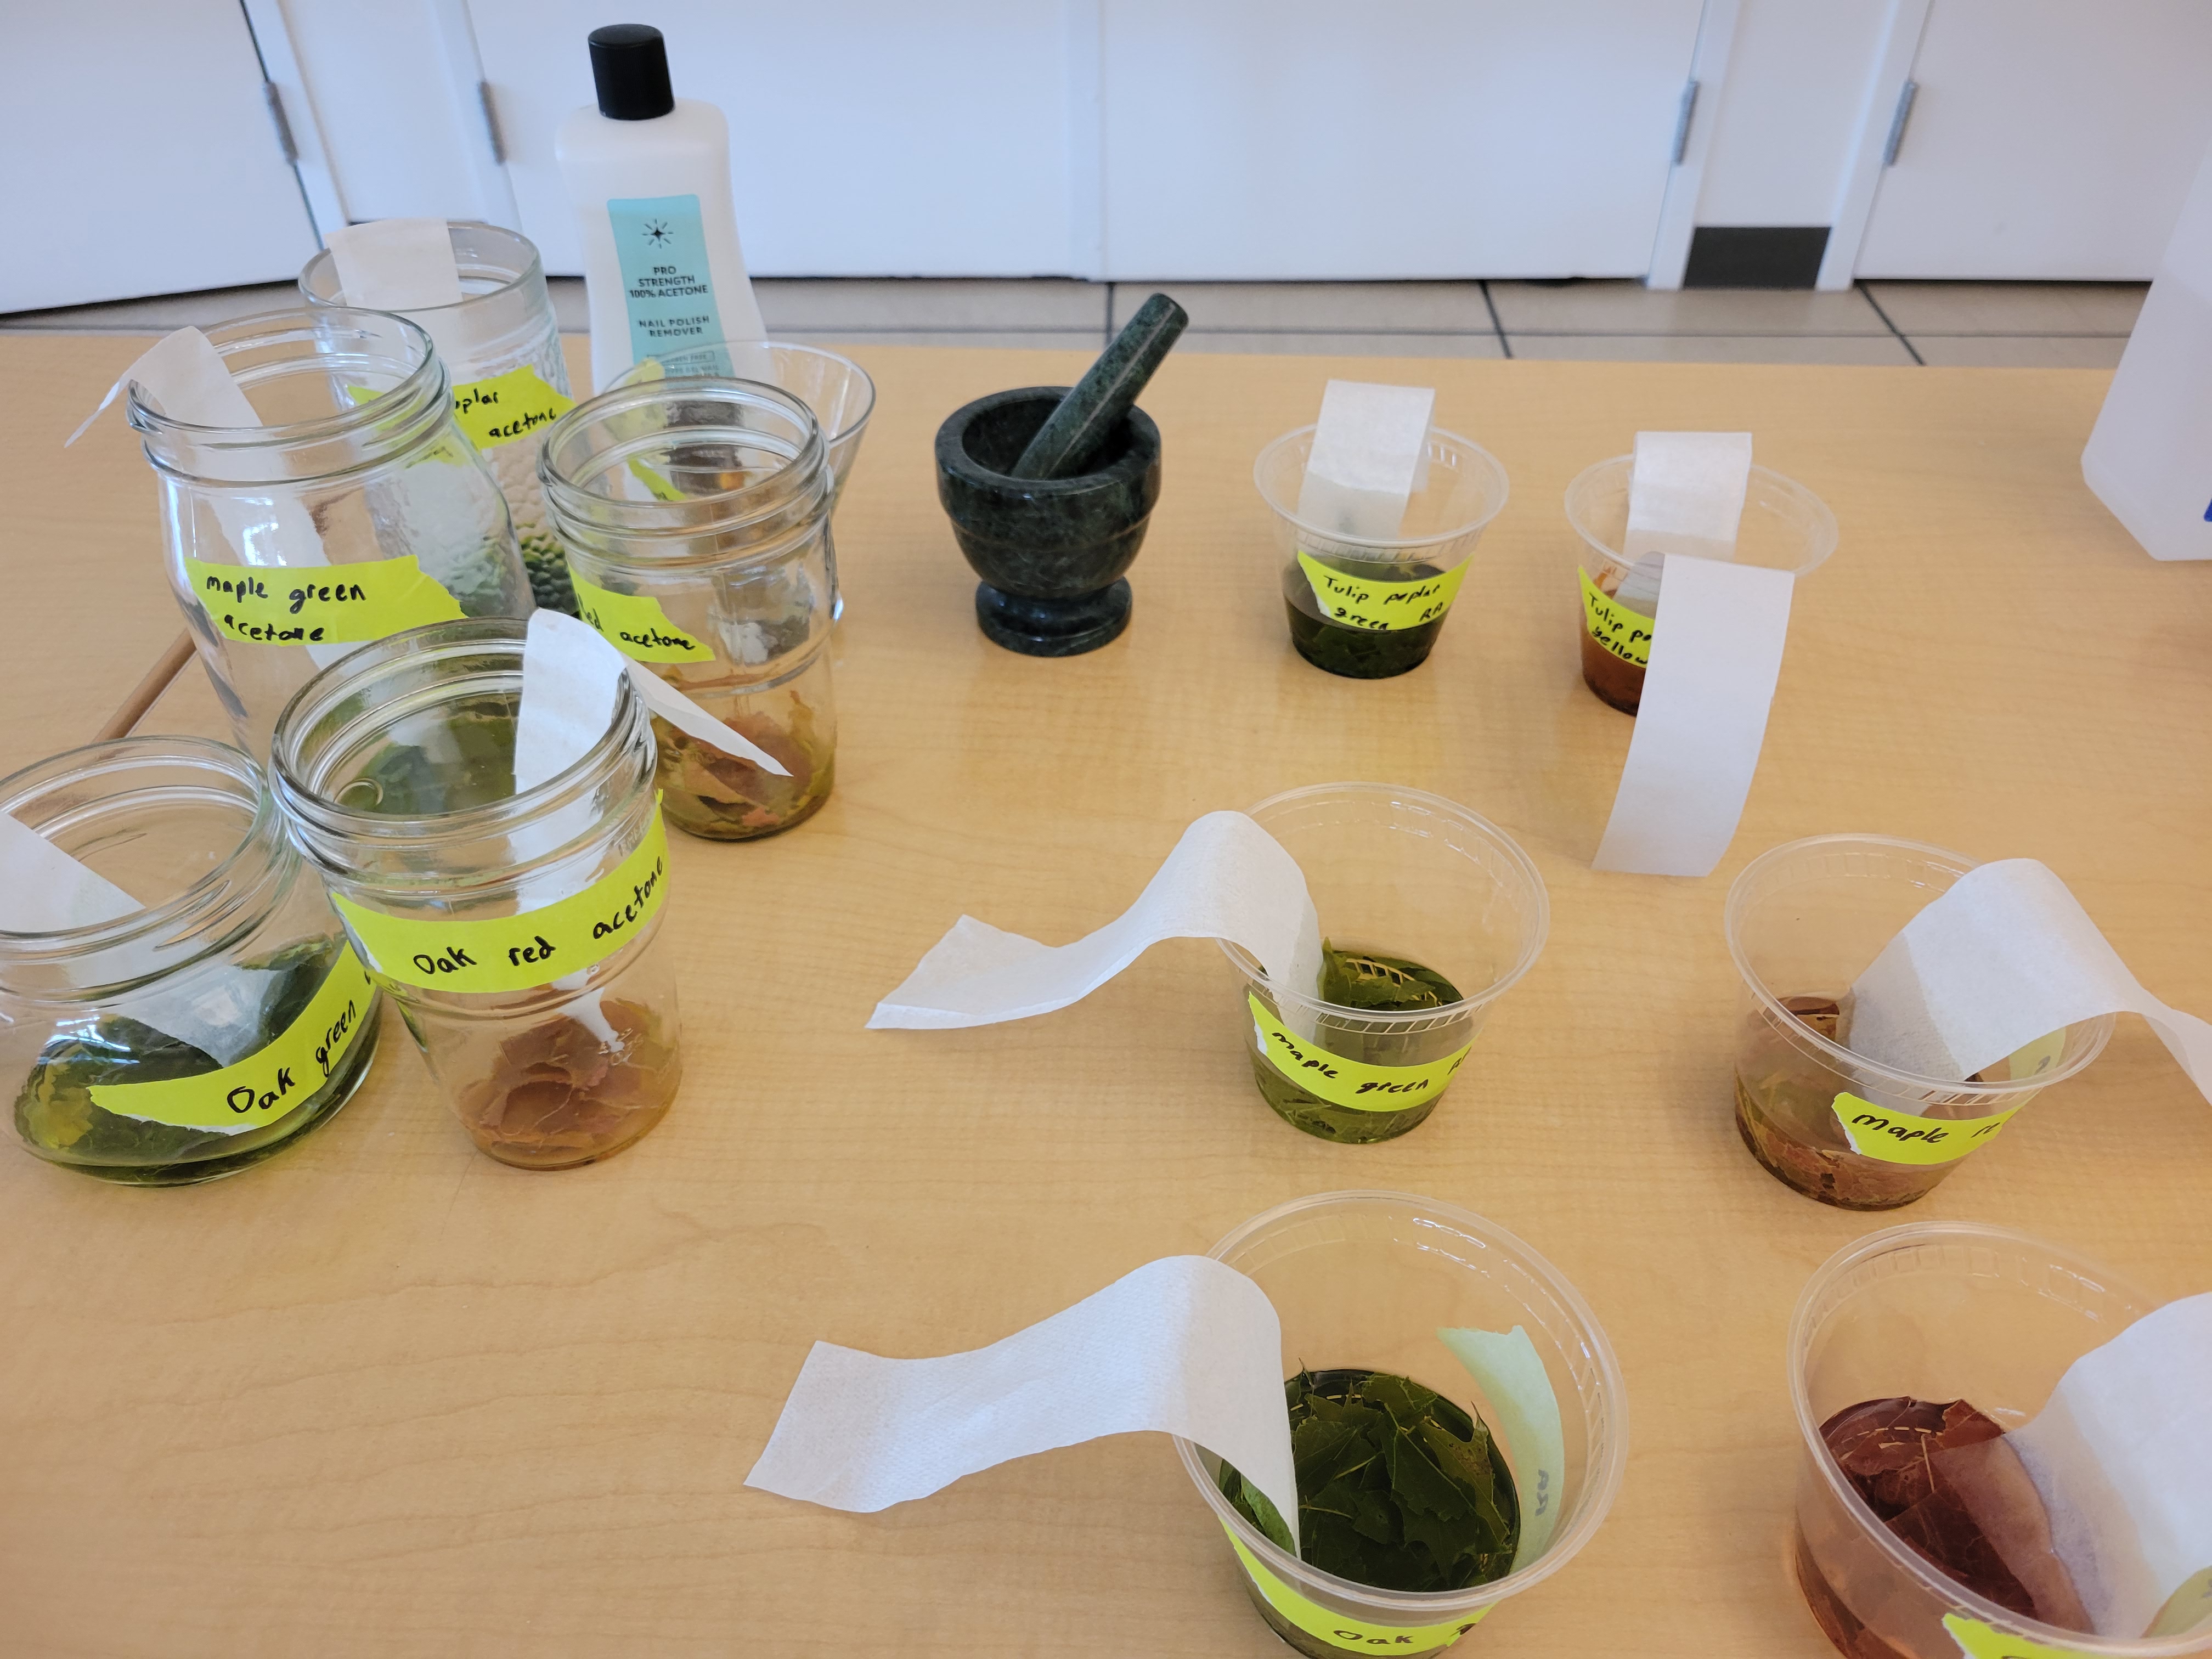
Gather up leaves from different trees – try different species and even different colors from the same kind of tree if you can! I sorted my leaves by species and color.
Next, label a set of cups for your leaves. If you are looking at multiple colors and leaf types, be sure to label your cups with the color as well.
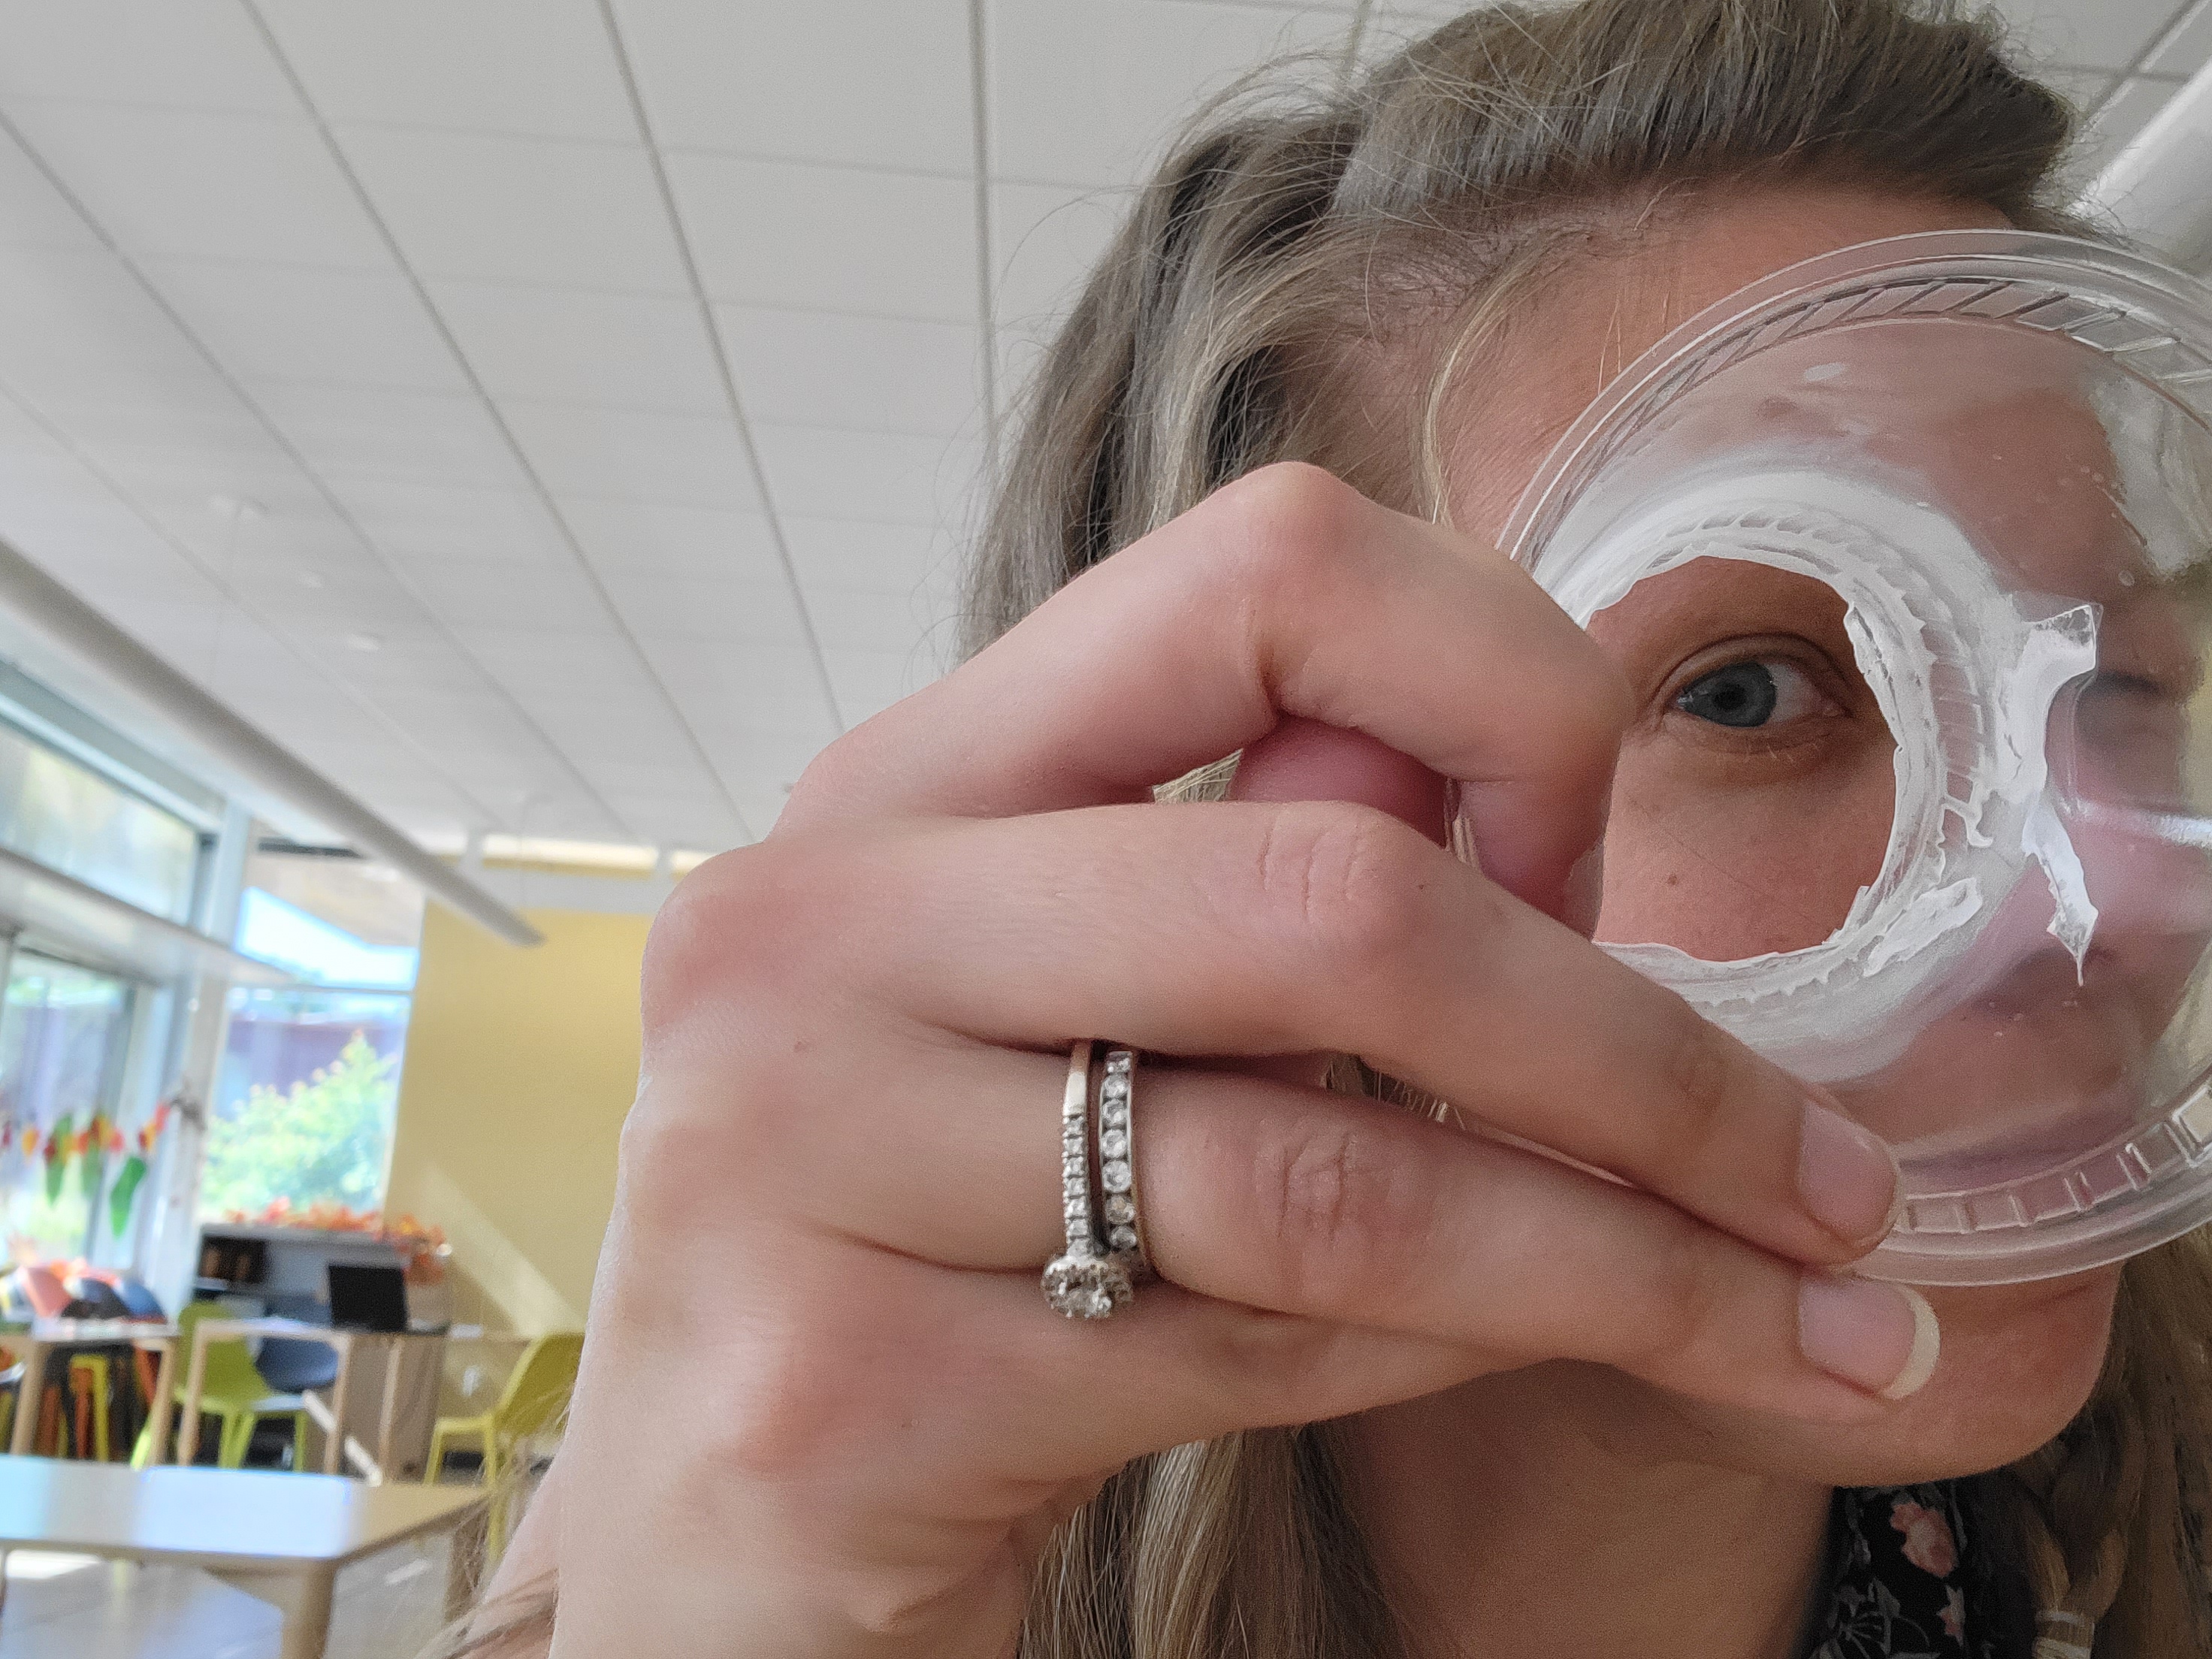
As an important note: do not use compostable bioplastic cups with the nail polish remover. This is what happened to mine:
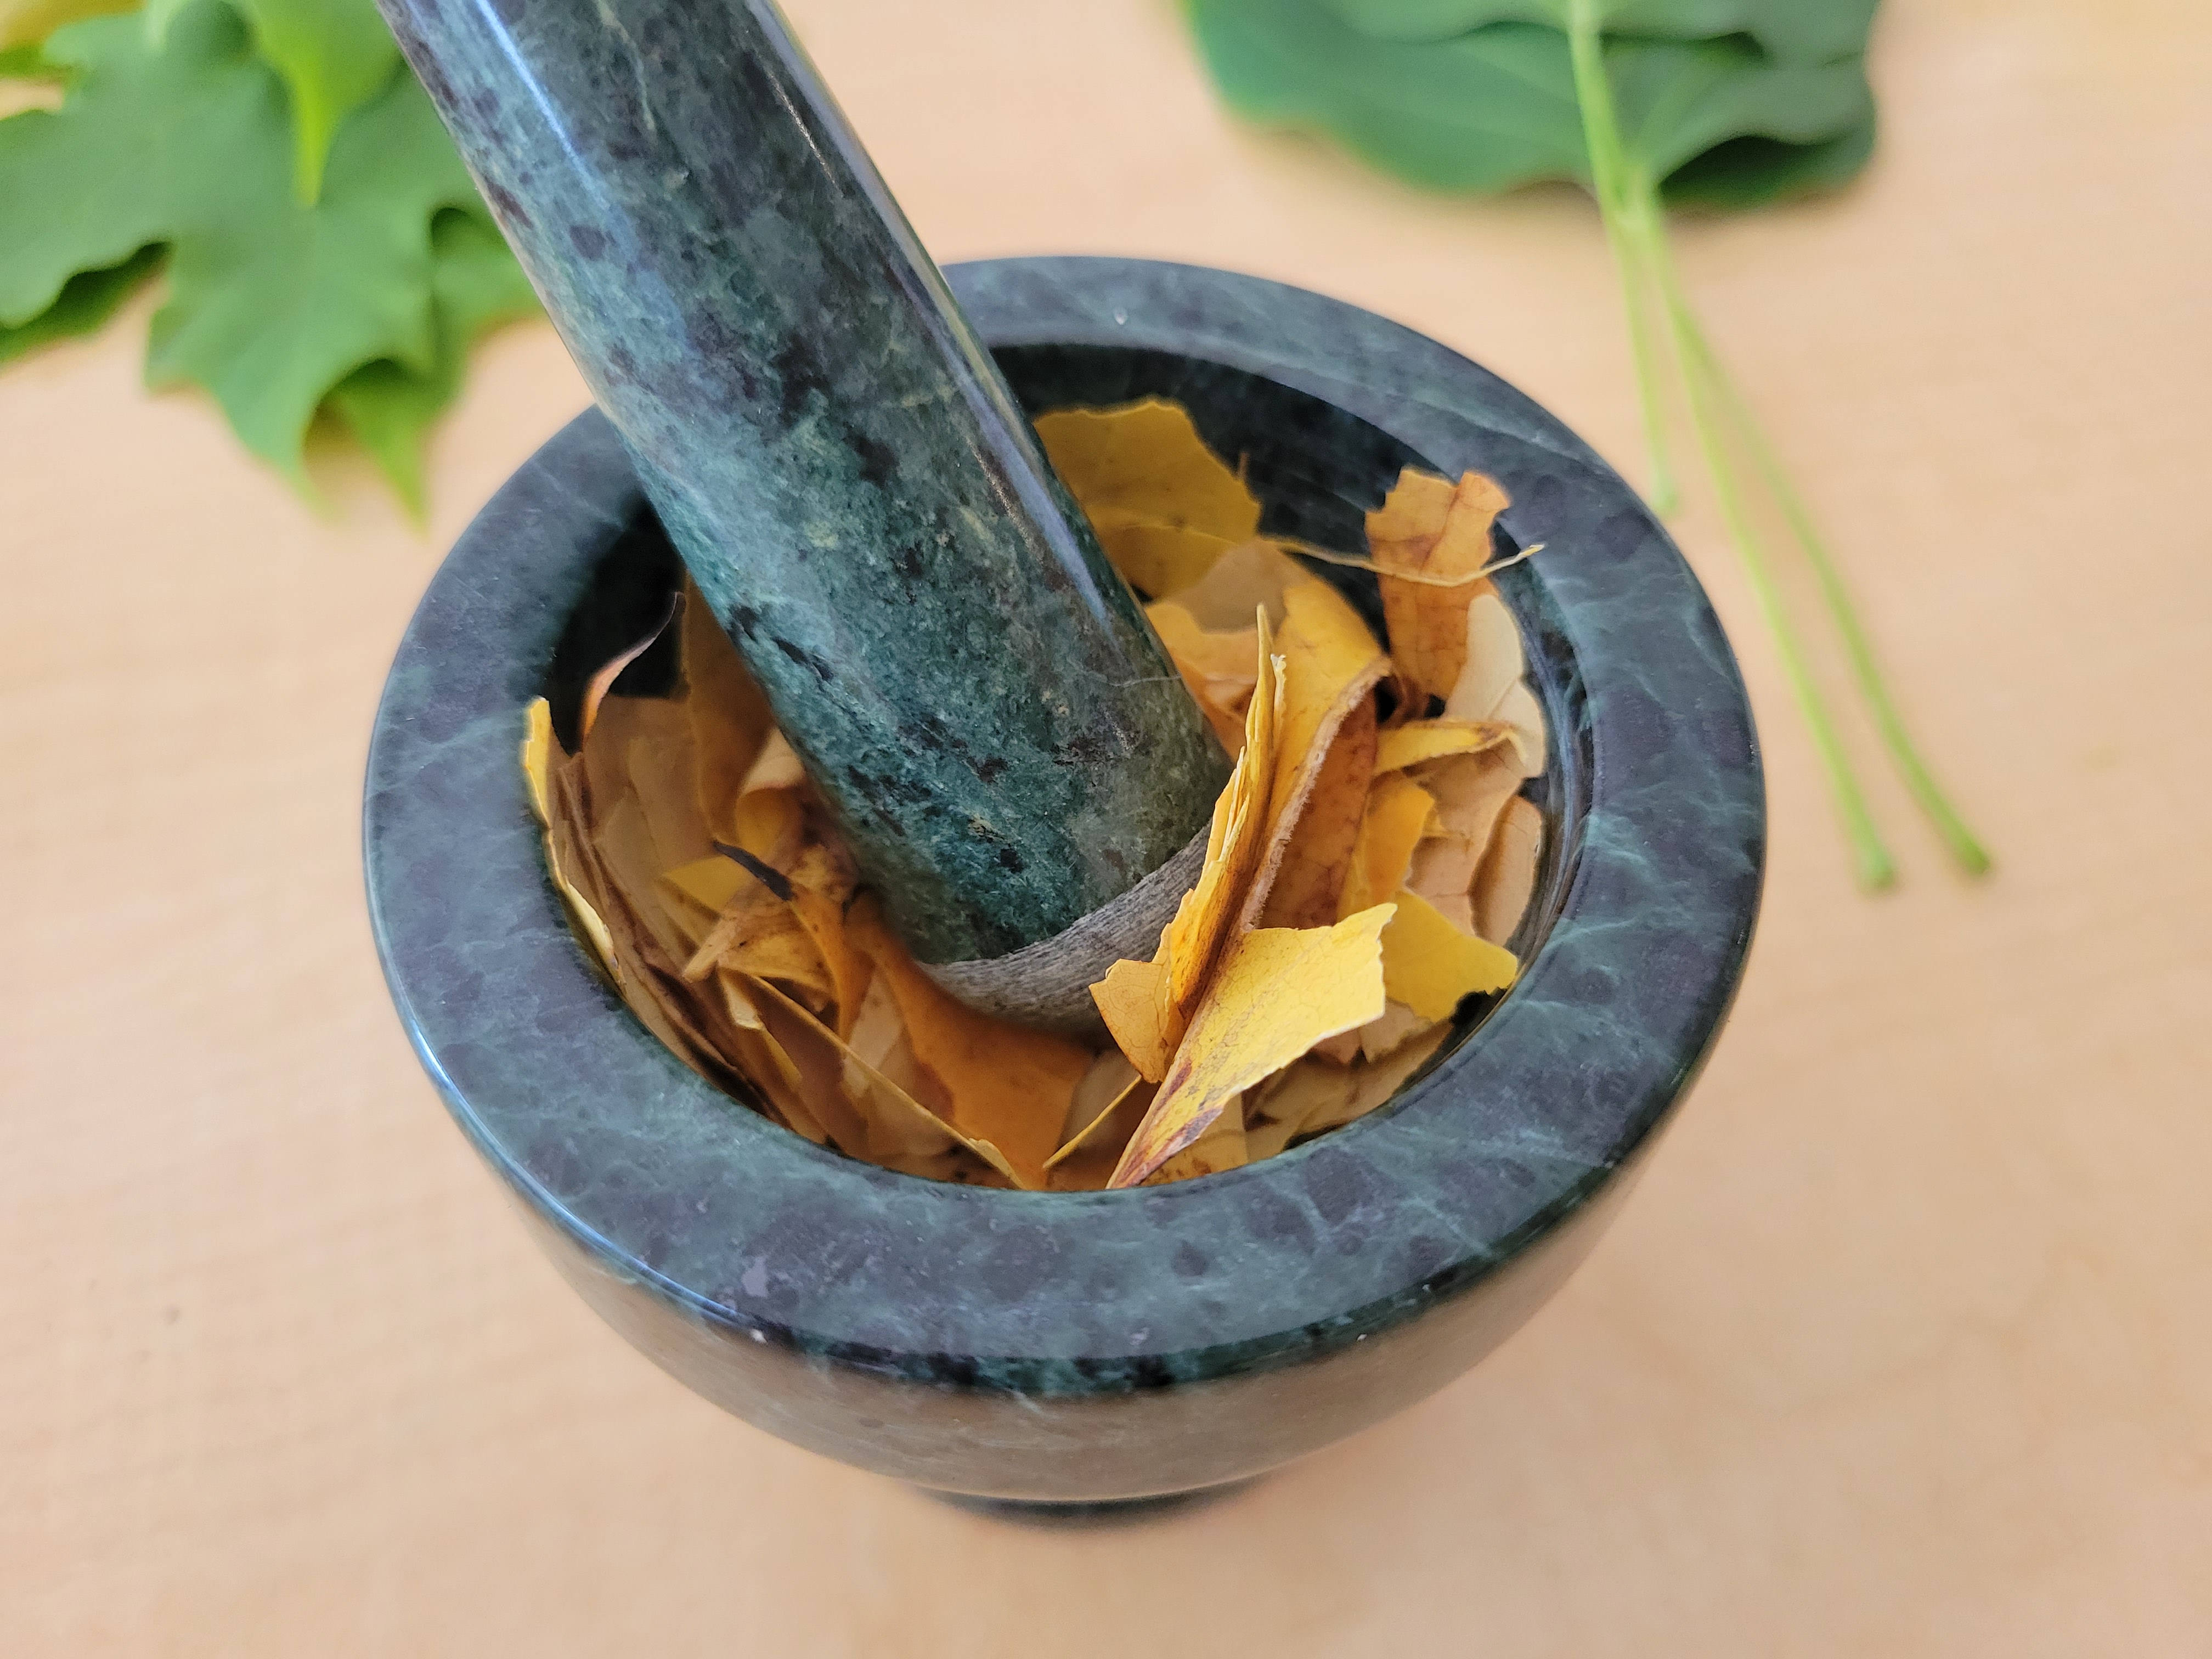
Once your cups are ready, tear up your leaf samples into little pieces and grind up each type with either a mortar and pestle or with a spoon. The idea is you want to break up the leaf to release as much pigment as possible. Be sure to rinse your tools between each leaf type!
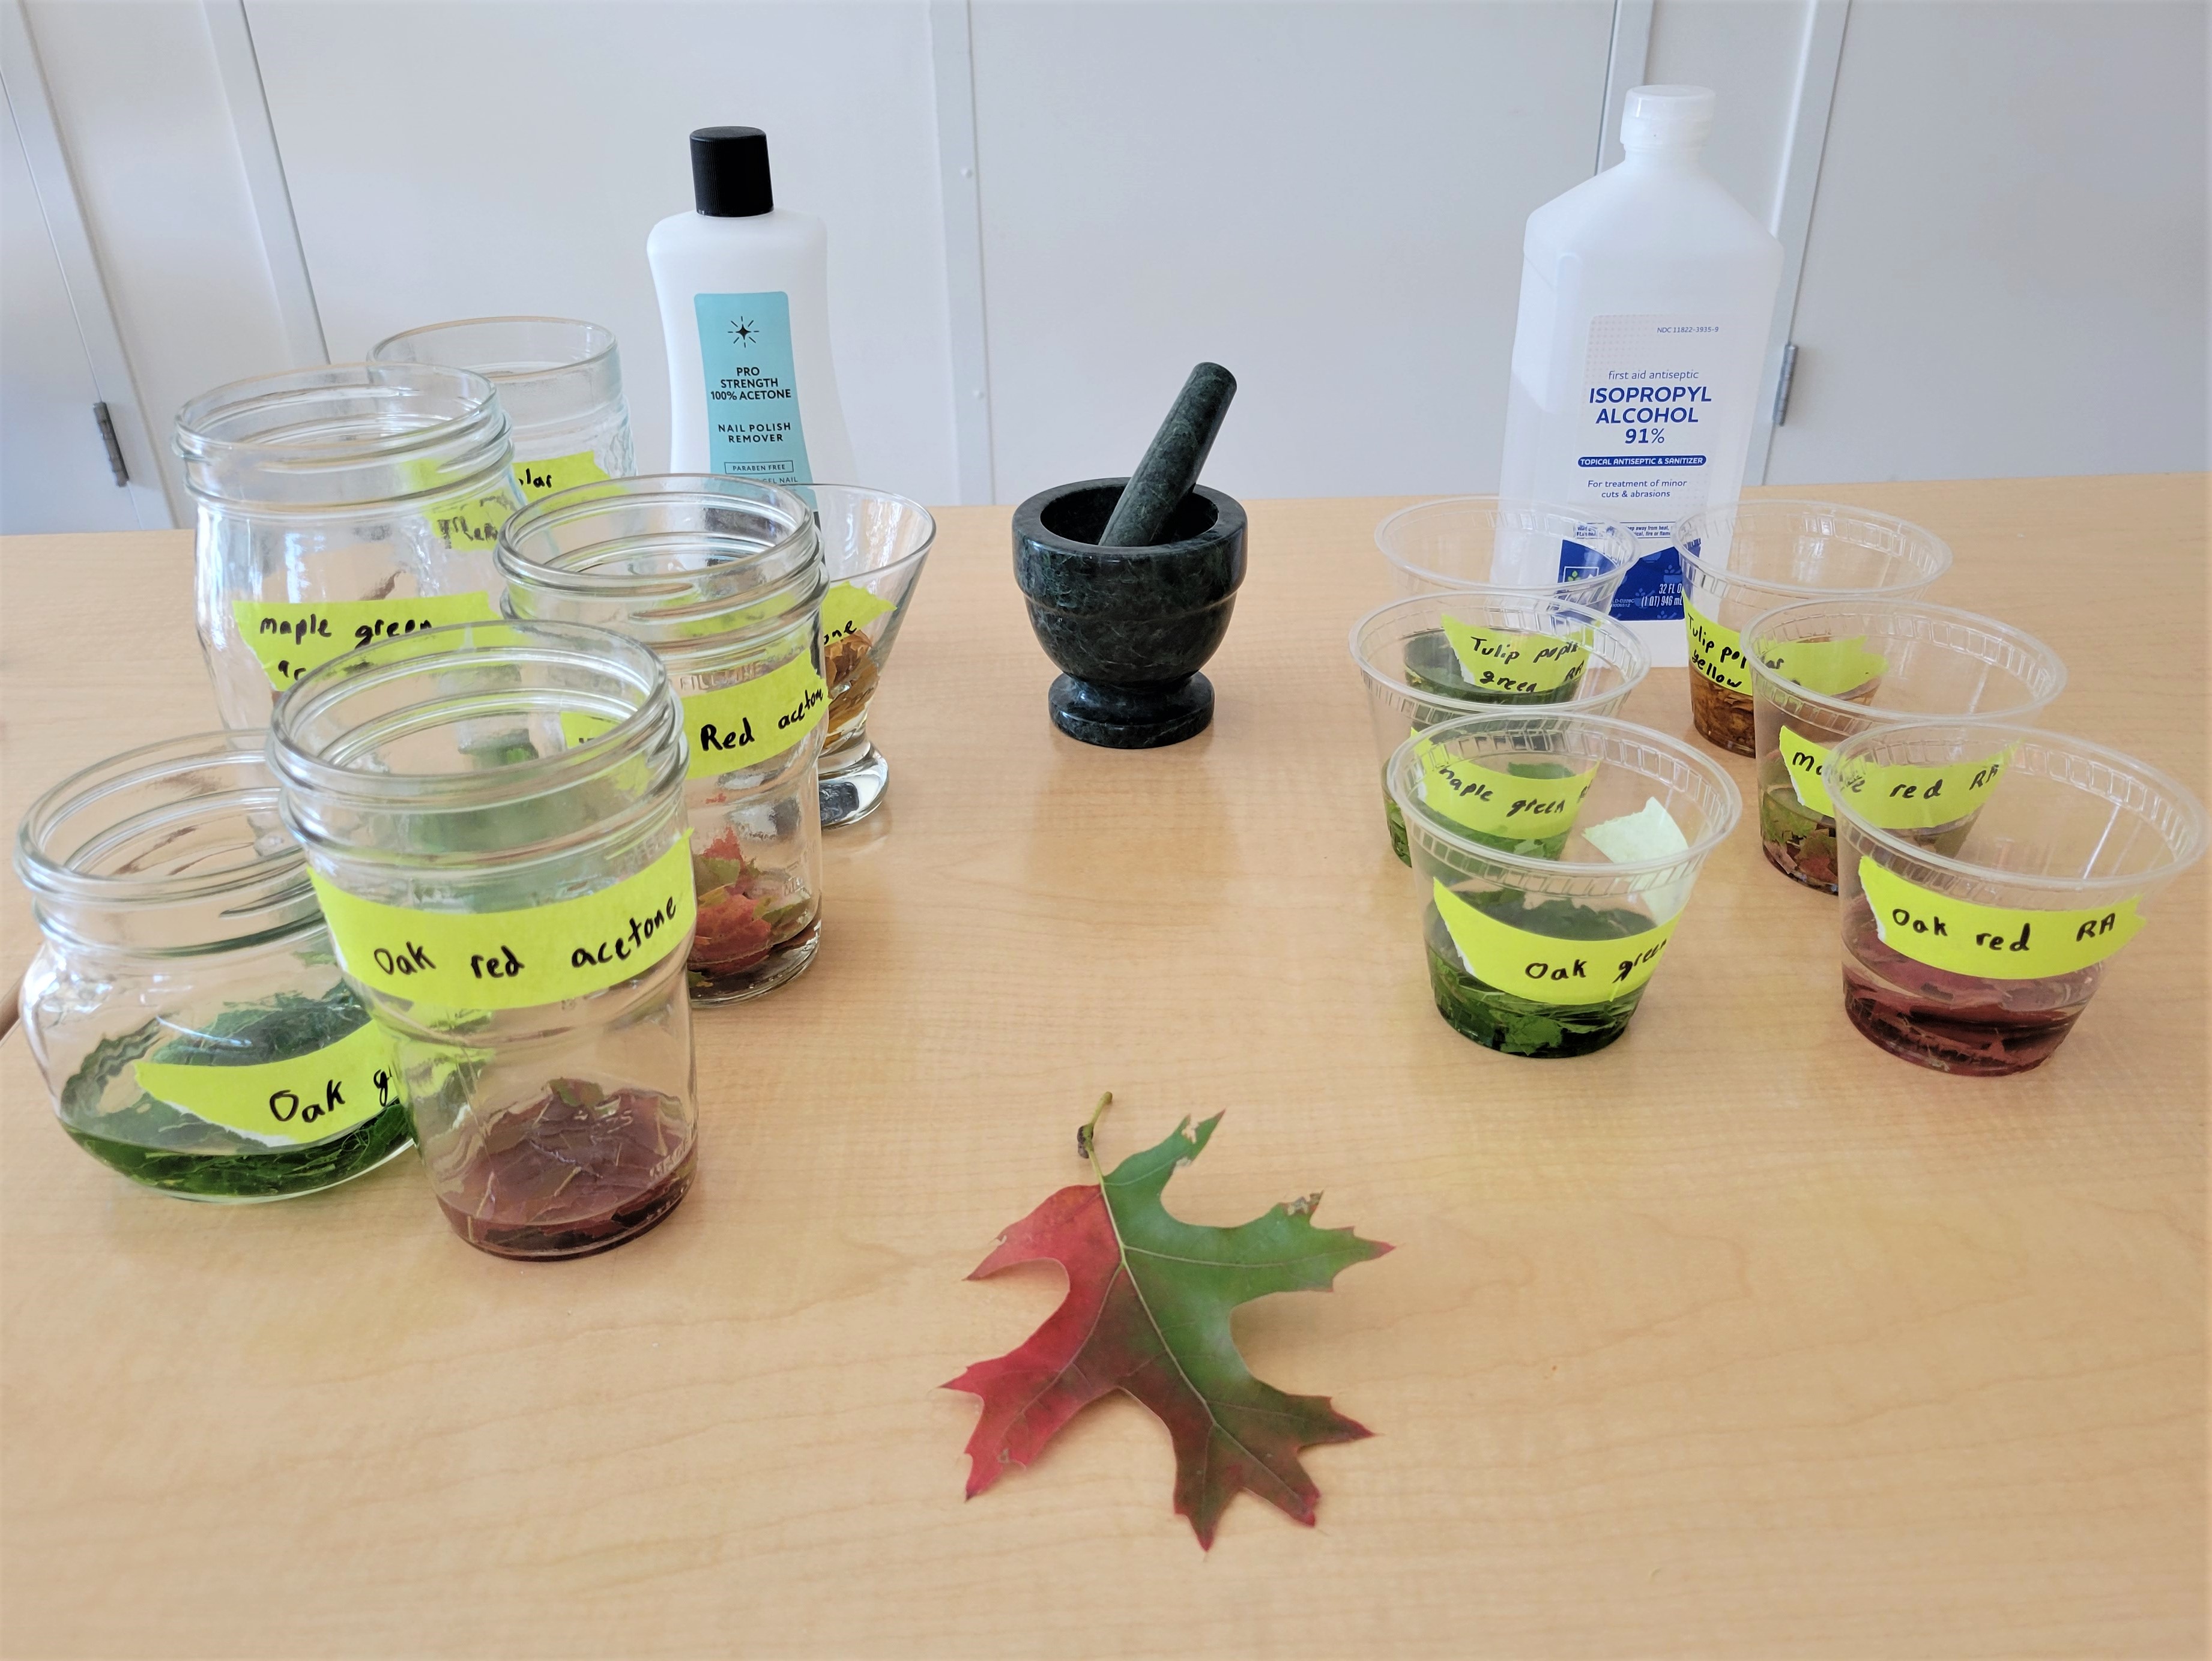
Once your leaves are mashed up and placed in their labelled cups, add enough of either your rubbing alcohol or acetone to each sample to completely cover the leaves and then have and extra tablespoon or so (does not need to be exact, you are just ensuring the liquid doesn’t evaporate.)
Let your experiment sit overnight to give the pigments a chance to dissolve into your liquid.
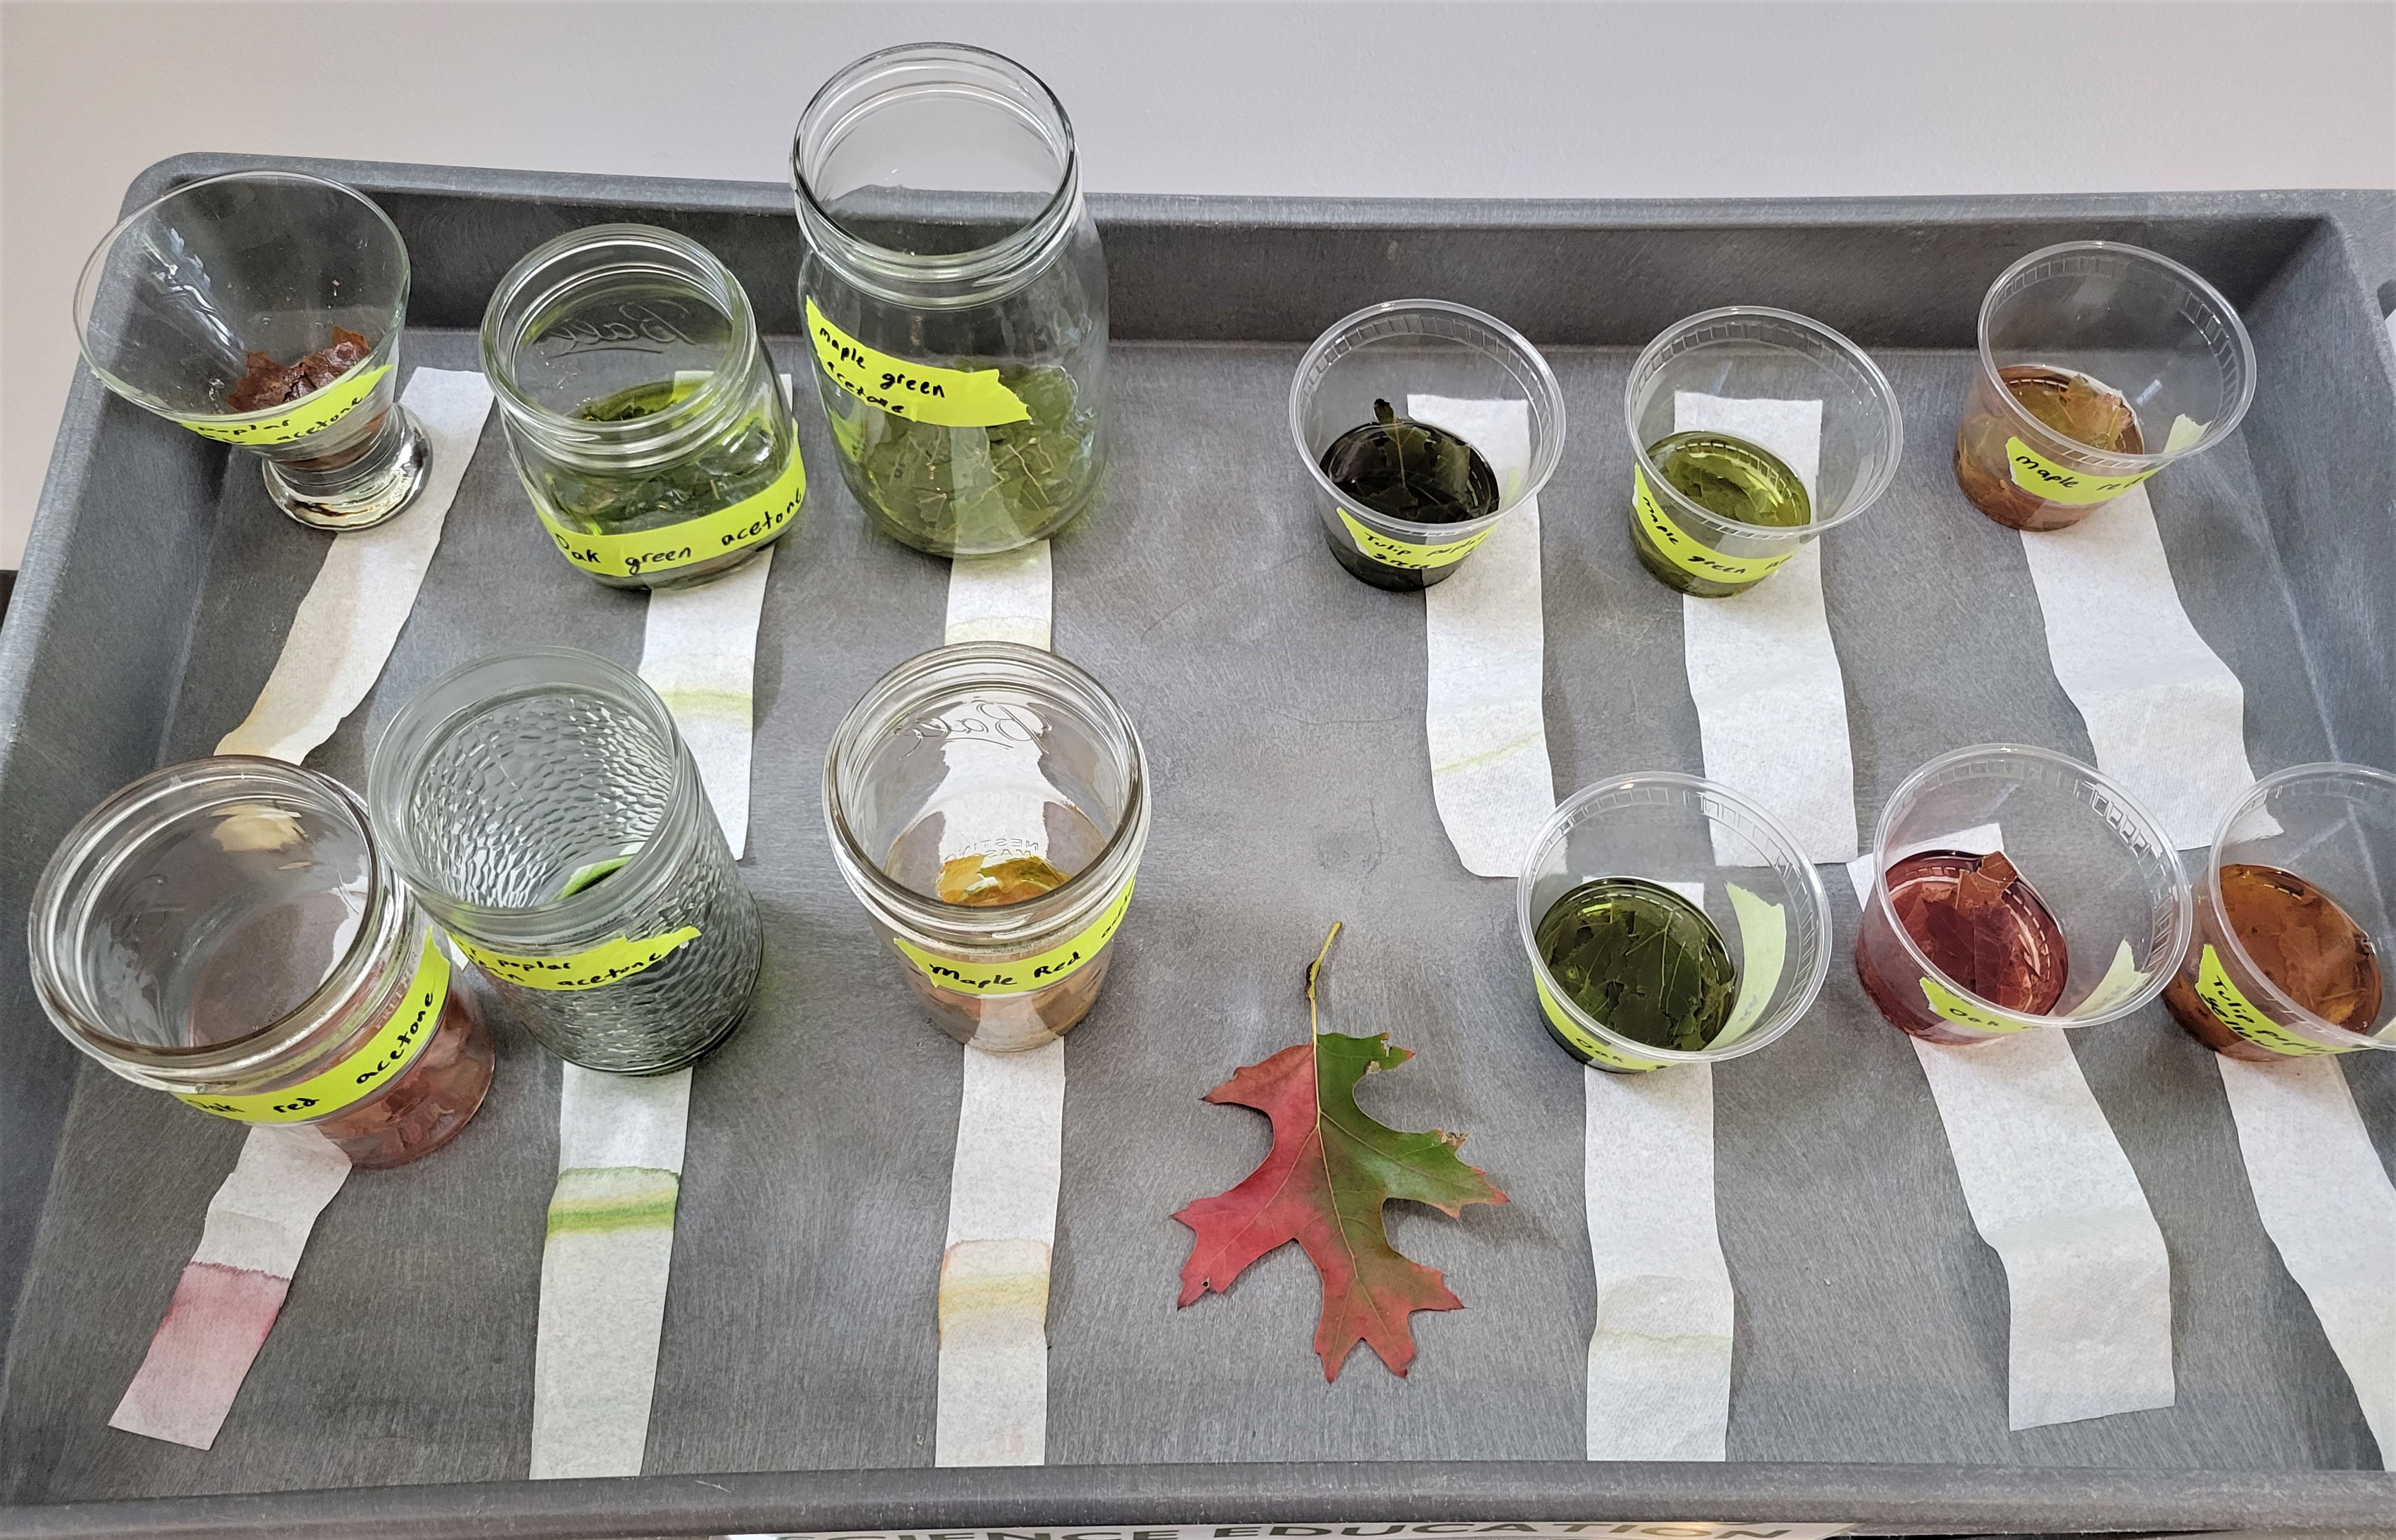
The next morning, take strips of either paper towel or coffee filters, and set one end of the strip in liquid, allowing the other end of the strip to stay safely dry. Allow the strips to sit in the mixture for 20-30 minutes.
After the solution has had a chance to move up the paper towel strips, you should be able to see bands of different pigments! How many different colors were in each of your leaves?
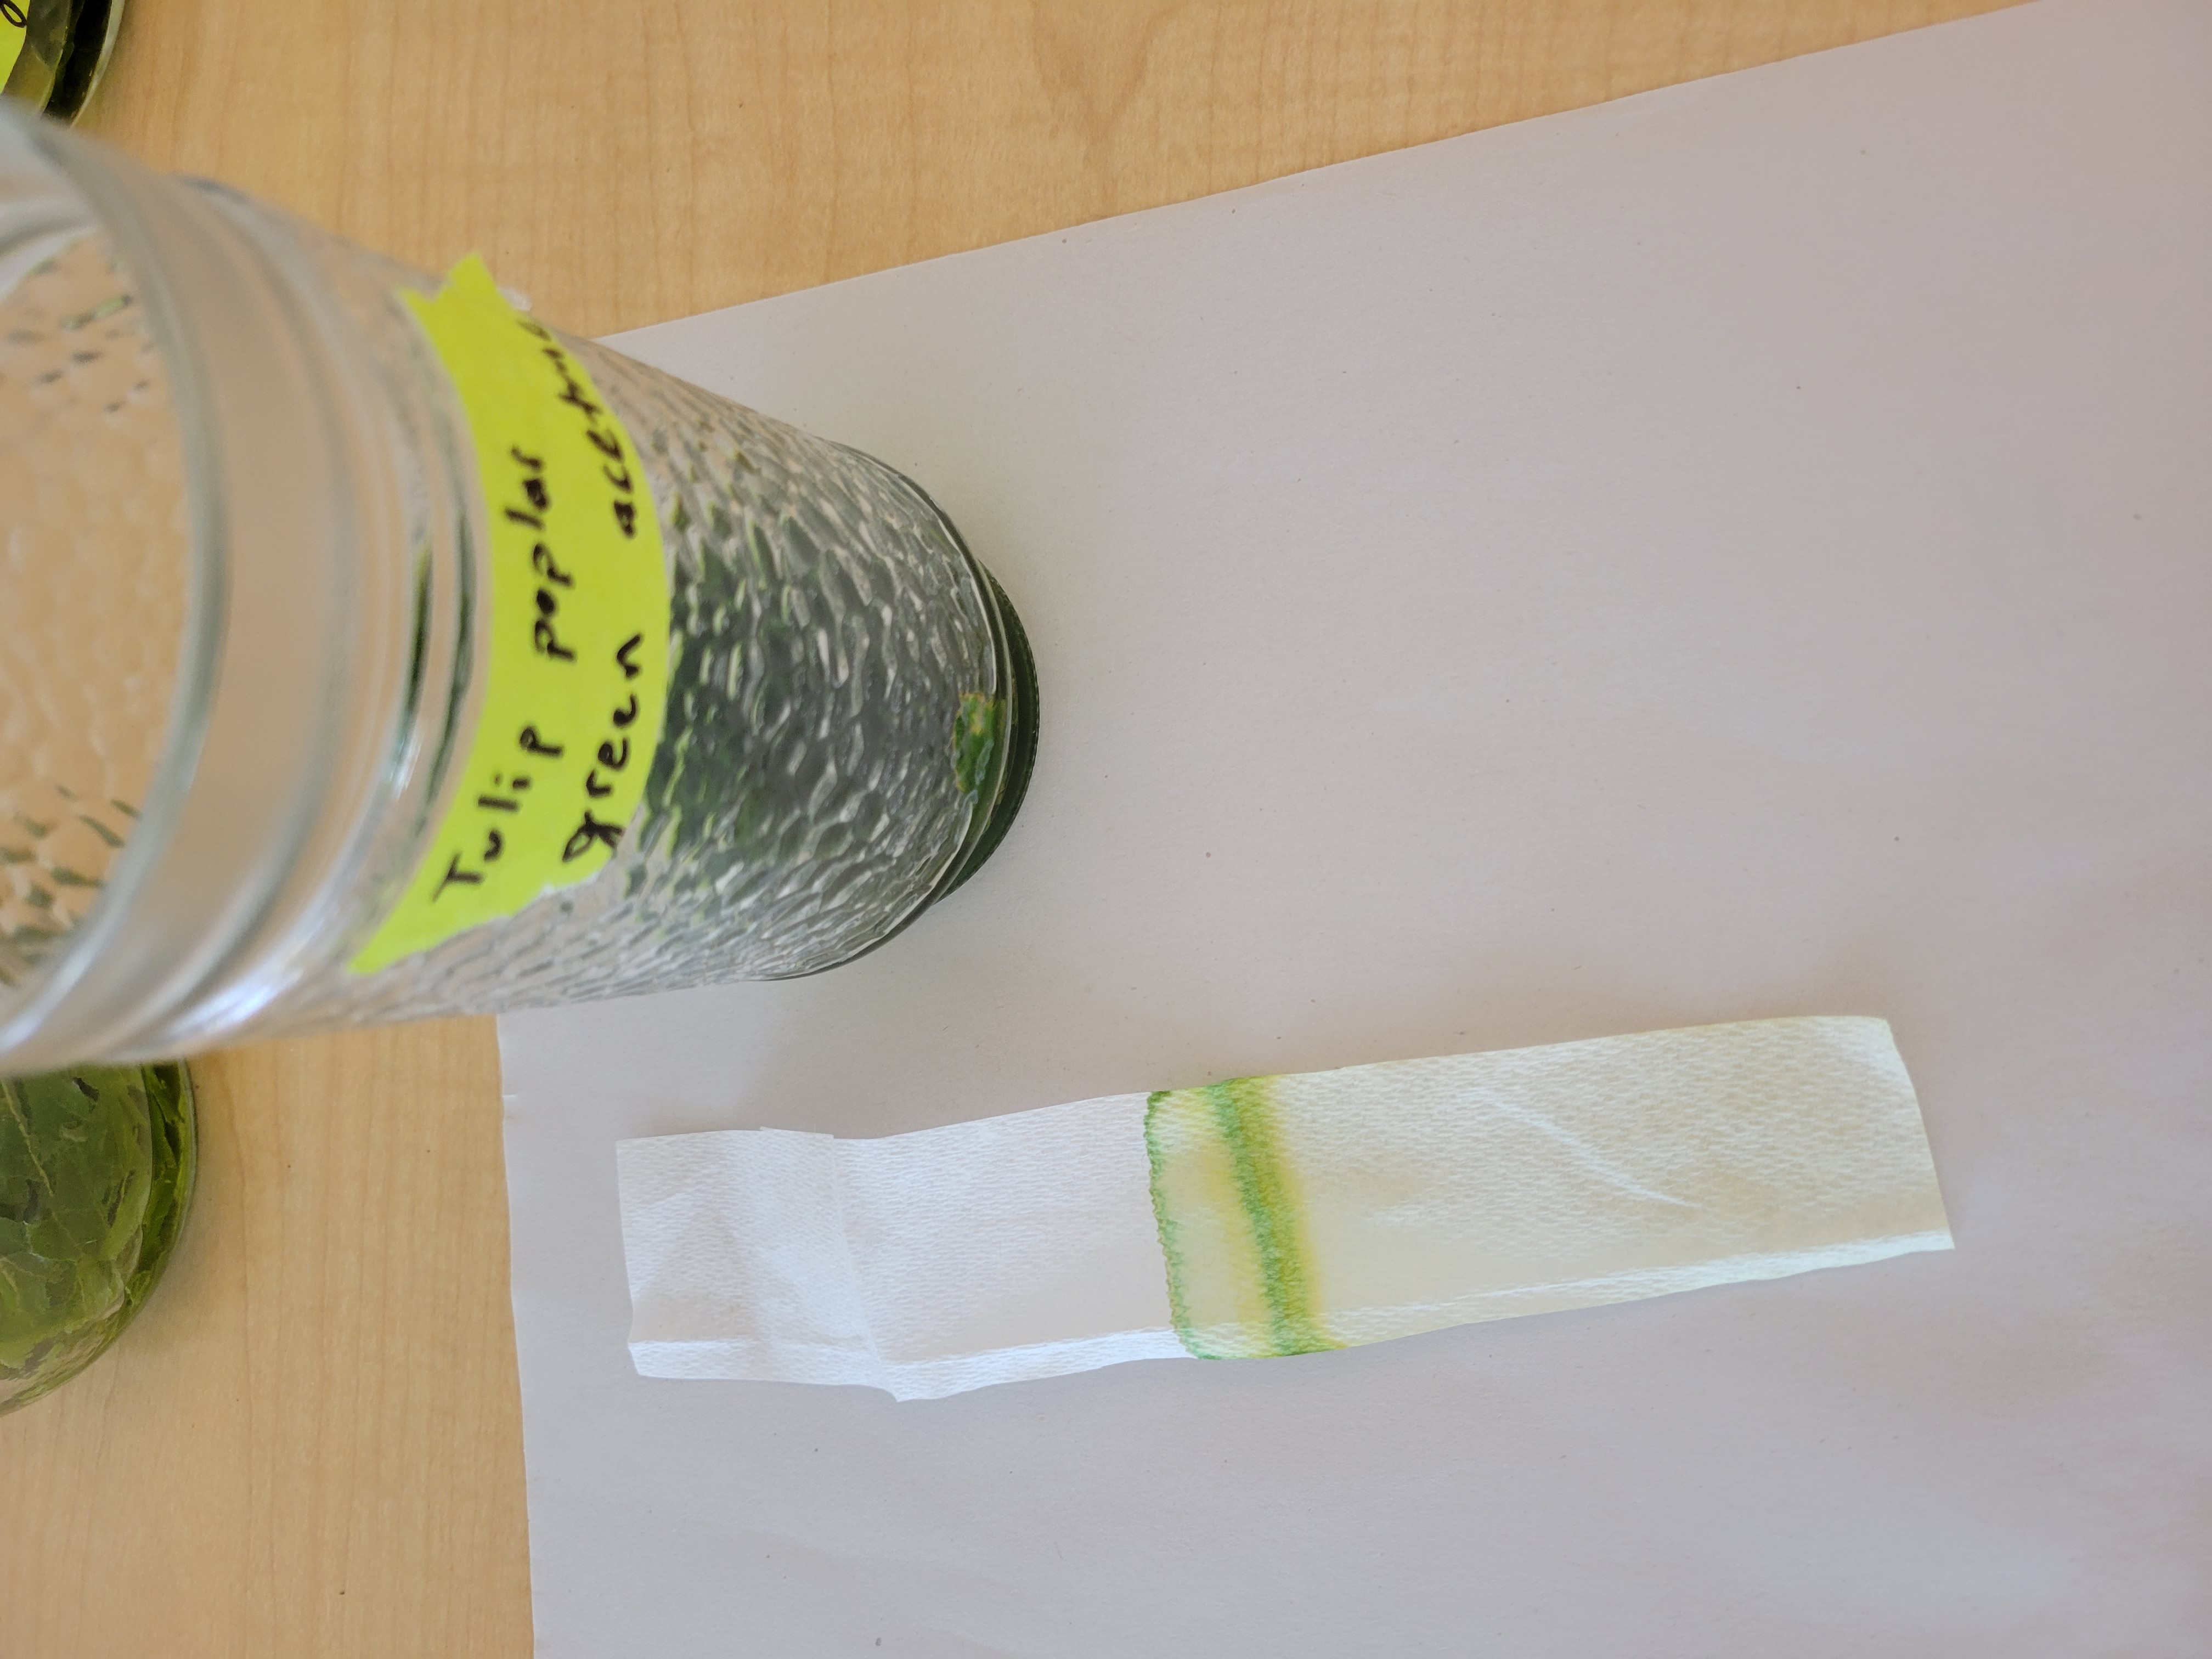
For example, in the image of the band from a green tulip tree leaf below, you can see both the green and the yellow pigments that will later be revealed as the chlorophyll breaks down for fall!
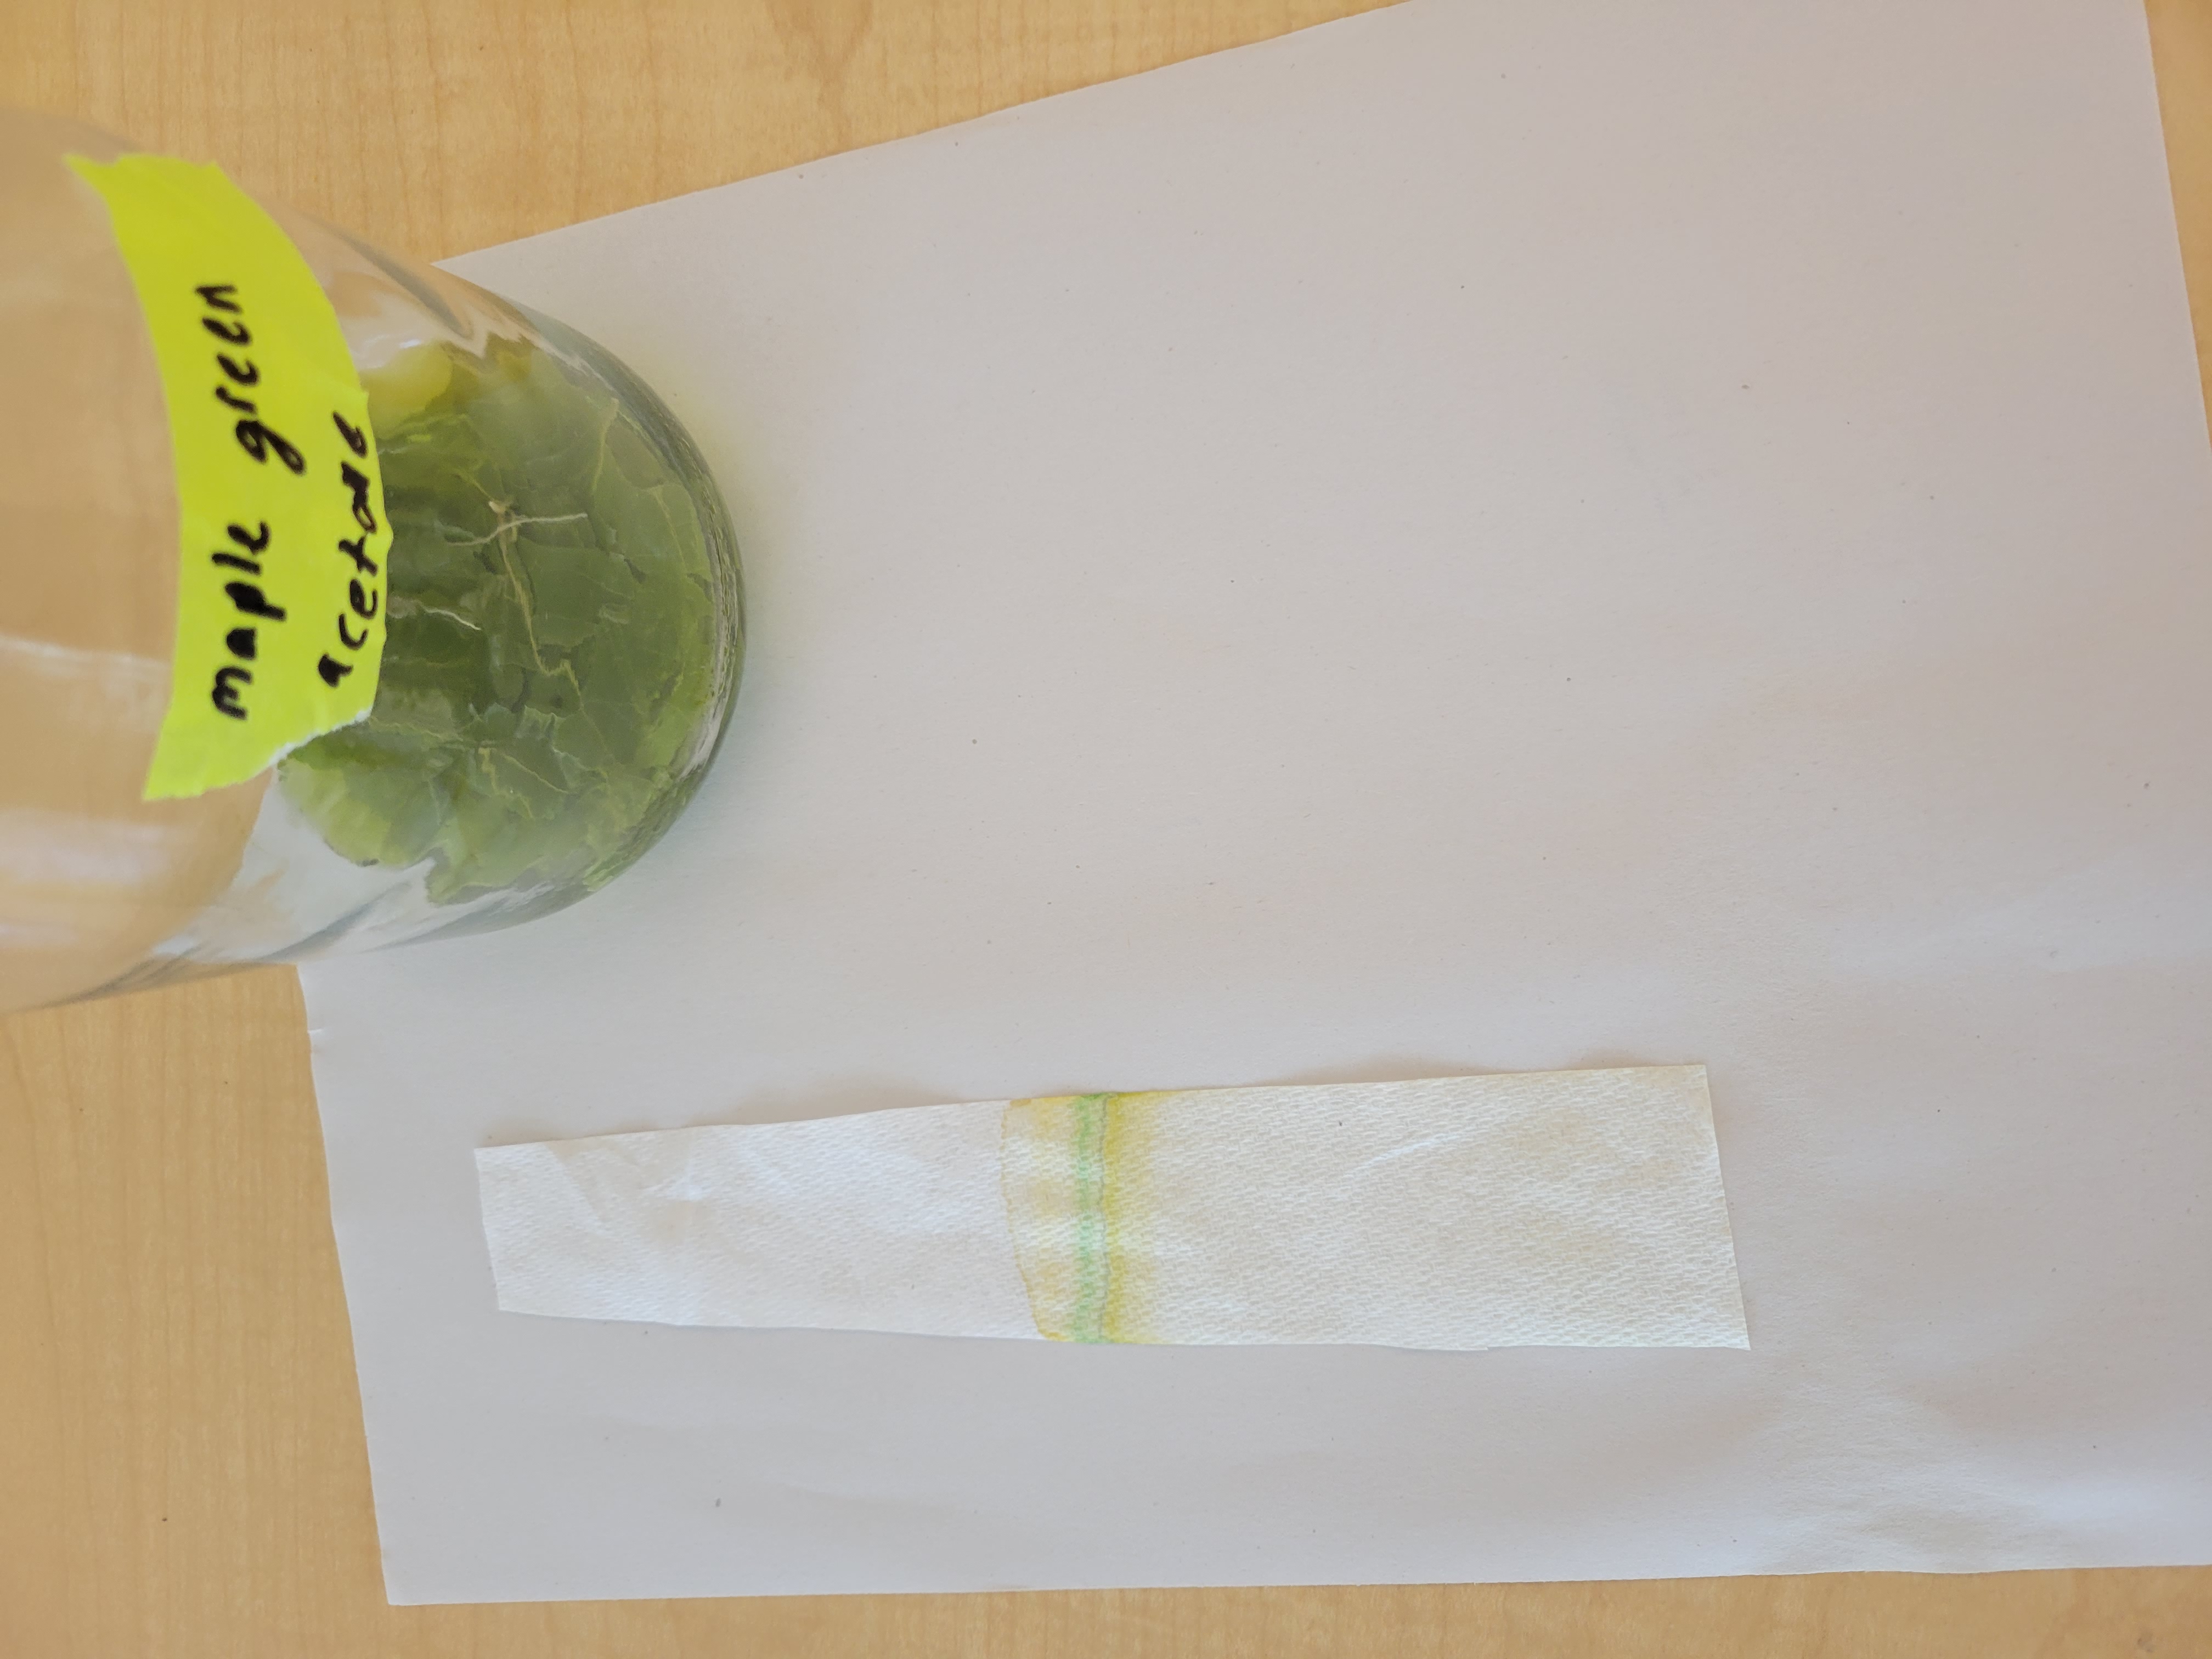
This green maple leaf’s colors separated out really nicely as well!
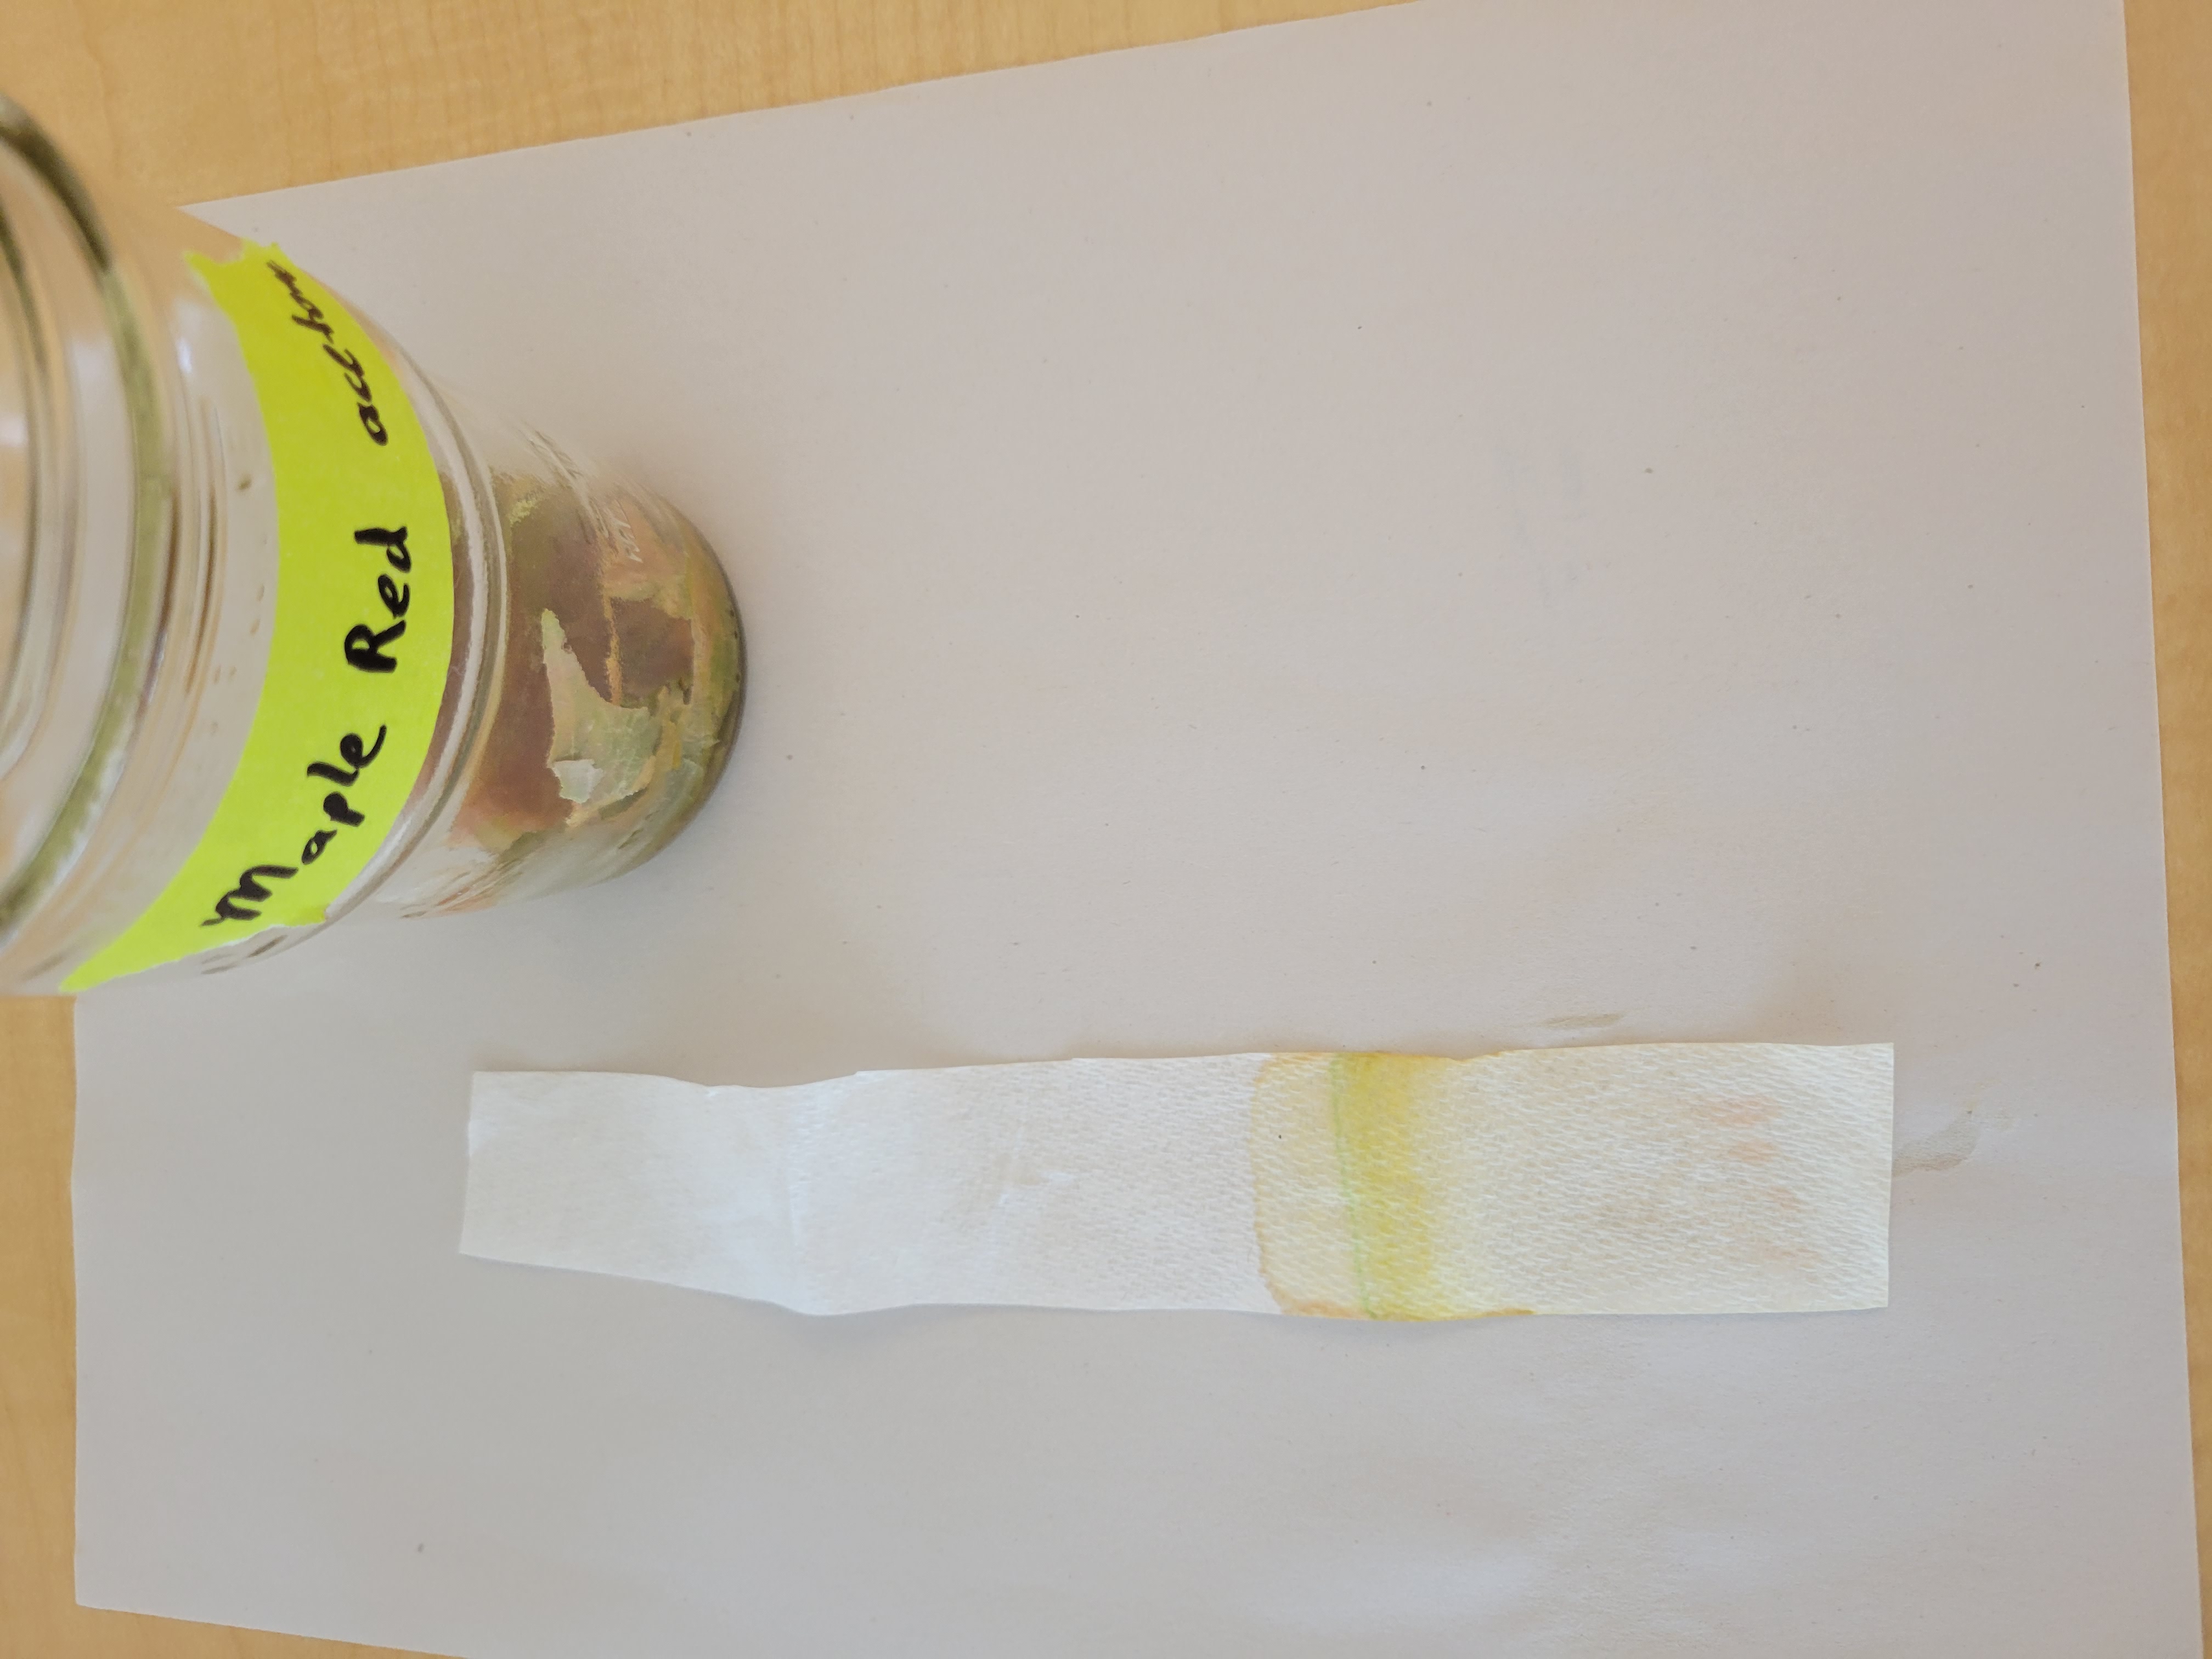
Notably, the red maple leaves that I used were still partially green. On the paper towel strip below, you can see a thin band of green in between the orange-red and yellow.
Give it a try and let me know what you find!
Continue the Conversation: Share your nature discoveries with our community by posting to Twitter and Instagram with hashtag #bioPGH, and R.S.V.P. to attend our next Biophilia: Pittsburgh meeting.


